Deborah R. Fowler
Posted on June 7 2018
Updated June 7 2018
Shogun Calibrating
Actors - Capturing ROM
ROM (Range of Motion) - bend every joint to
their limits - fuss with your markers to capture joint
information
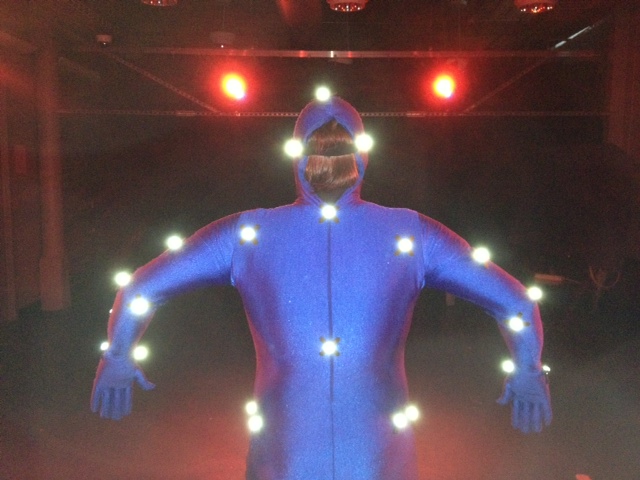
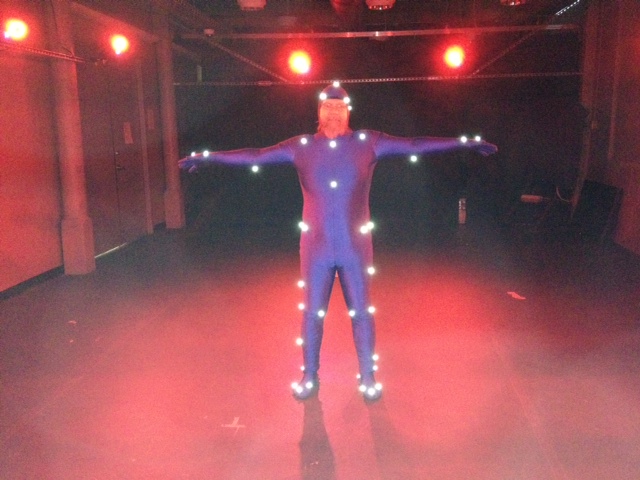
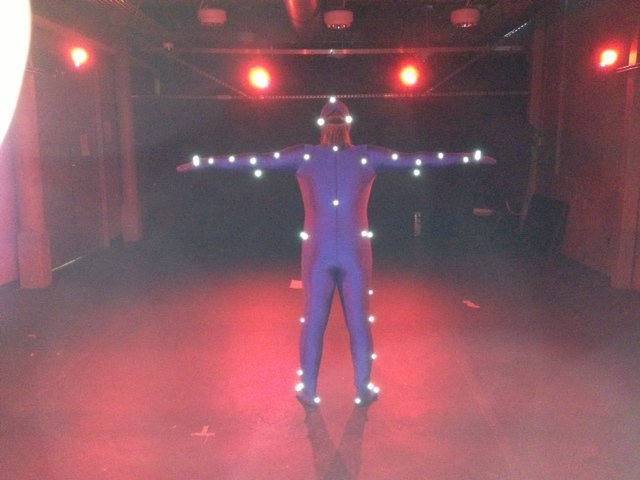
Capturing is the process of recording all 2D camera data. When capturing, only 2D camera data is recorded, although you see 3D data in your workspace. The data in Shogun is processed live! (if desired, can be processed offline in post), providing the 3D "reconstructions". Note we use a t-pose because autolabel looks for this and in addition, characters models are easy to append skeletons to the models.
We are using a passive optical system; markers are made of tiny glass beads, 3M retro-reflective tape would work too.
Your database should have already been set
up!!! If for some odd reason it has
not - make sure it is in place now. See database
setup.
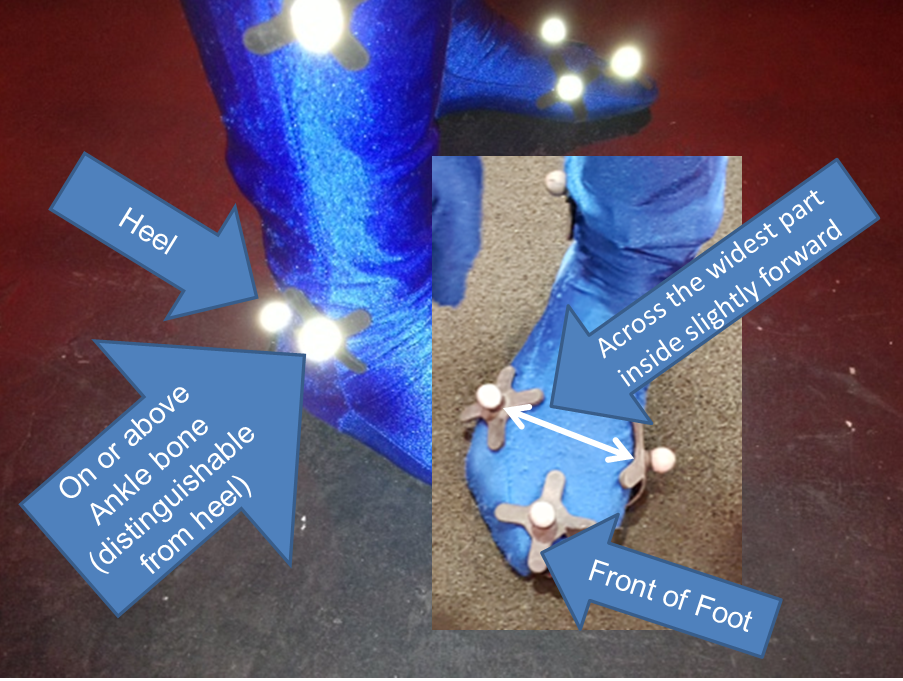
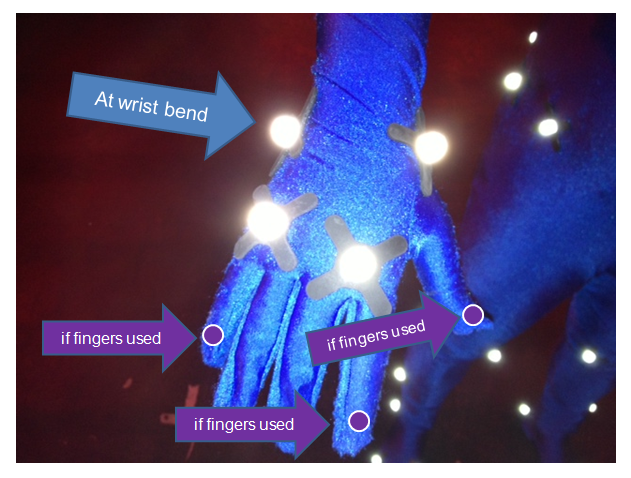
Marker Placement for Vicon Shogun - same as for previous version of Blade - here are some reminders
Vicon Shogun guide

|
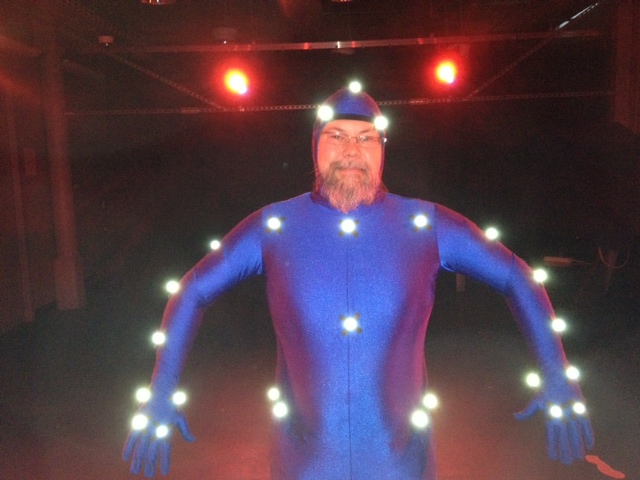
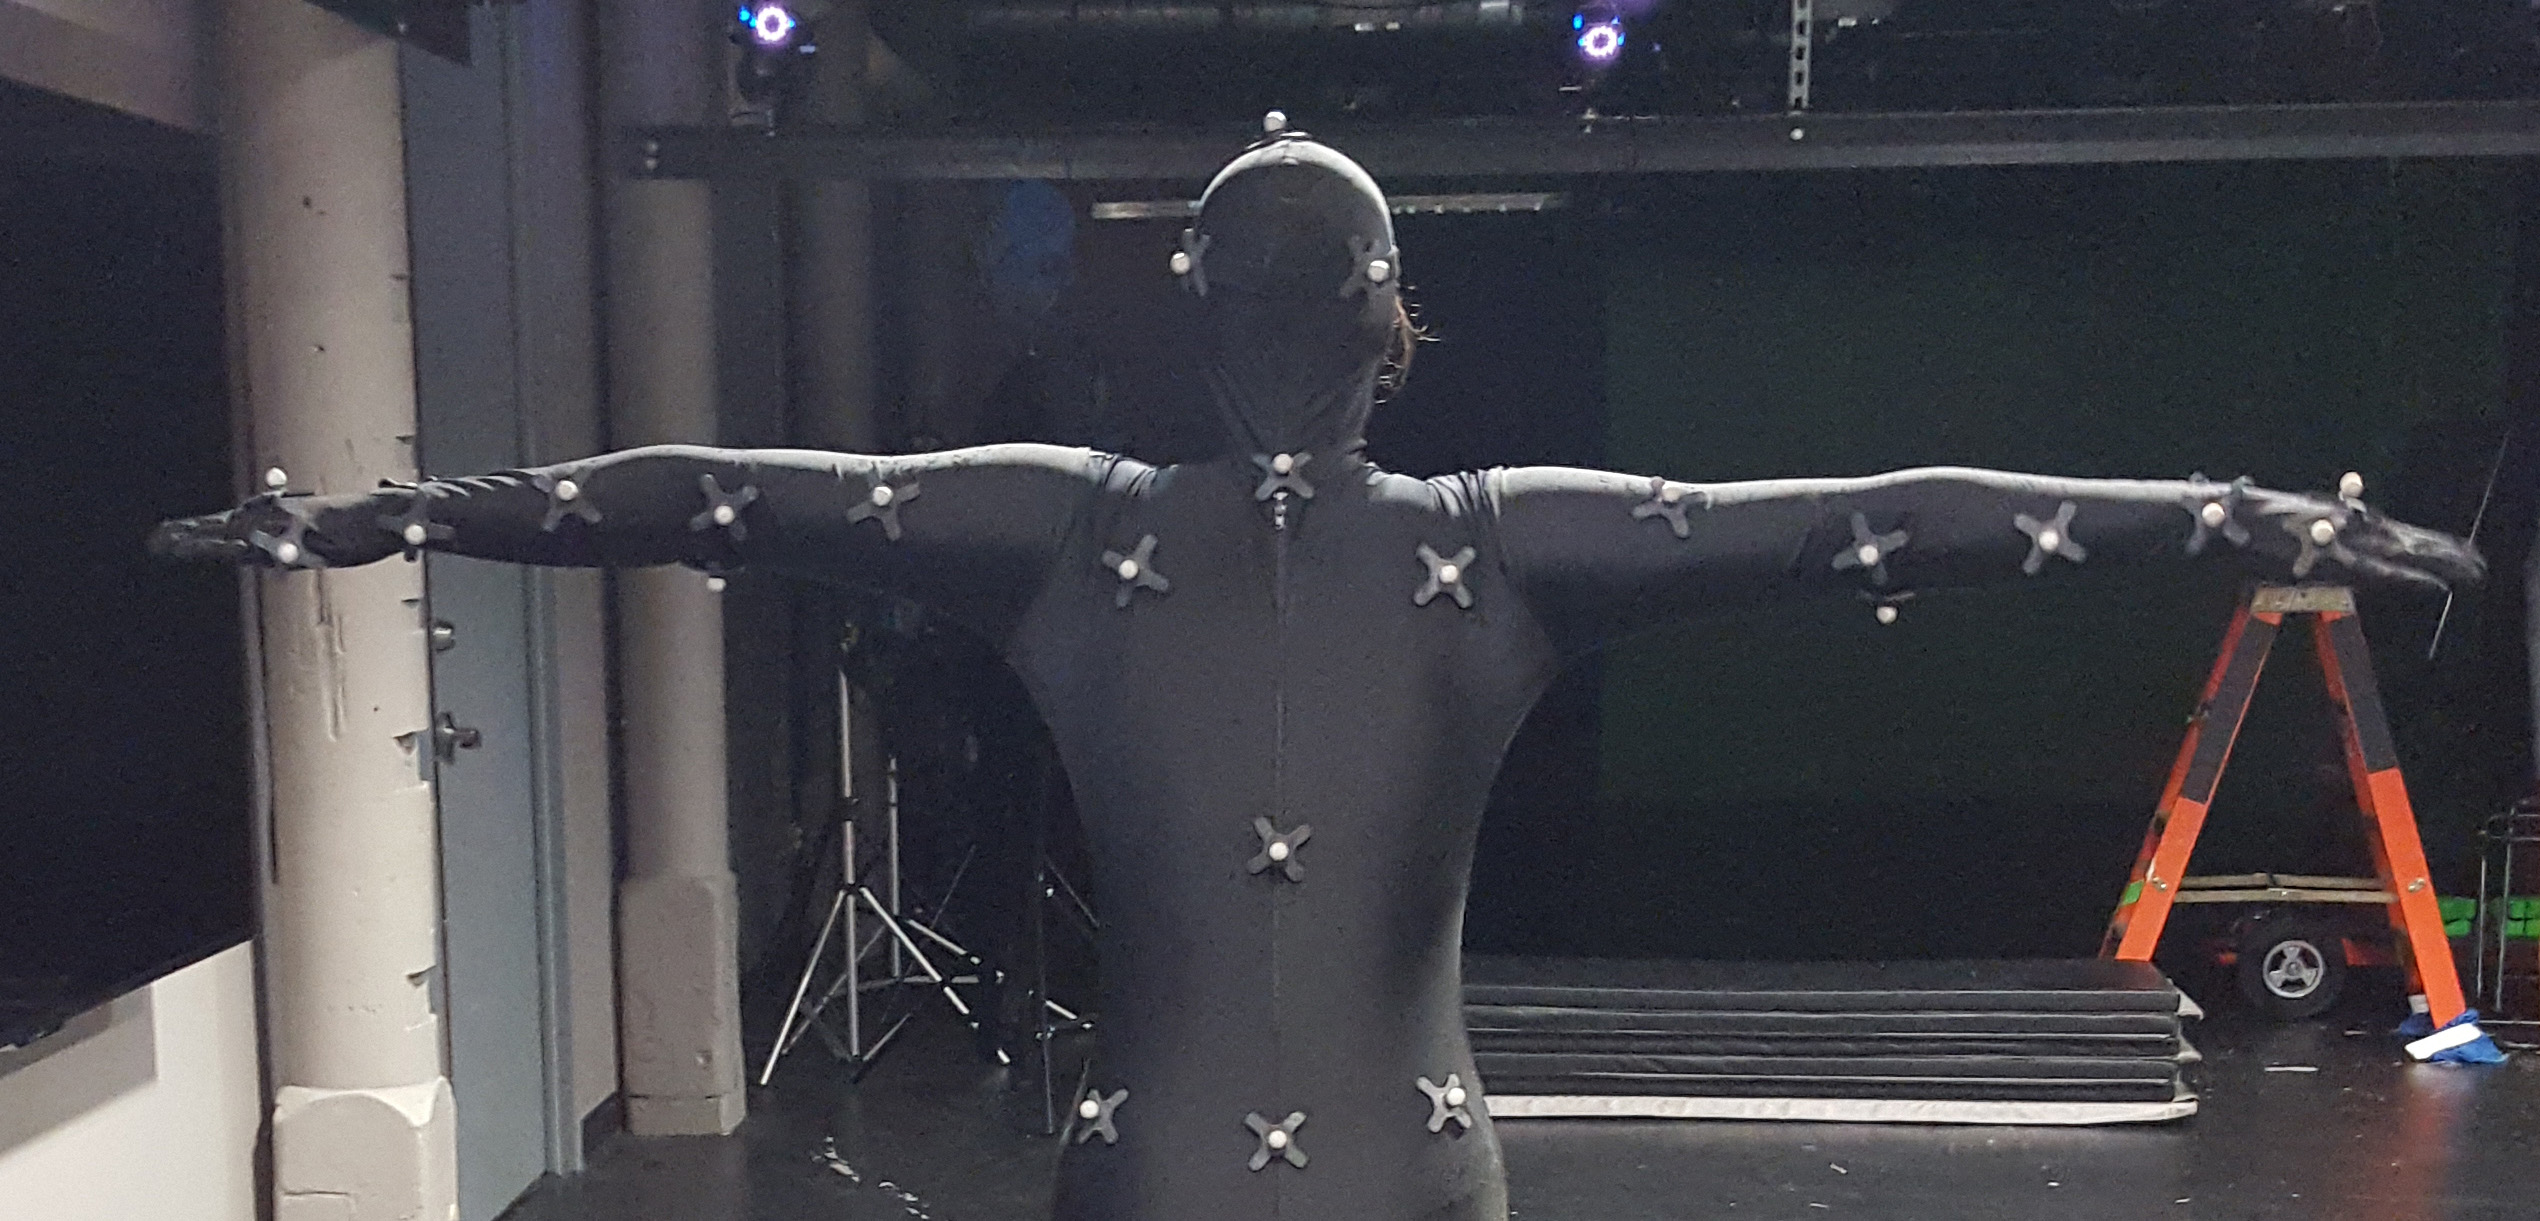
53 markers total (when doing fingers there will be 59 total) CLICK BLUE LINKS BELOW FOR PREVIOUS BLADE PICS
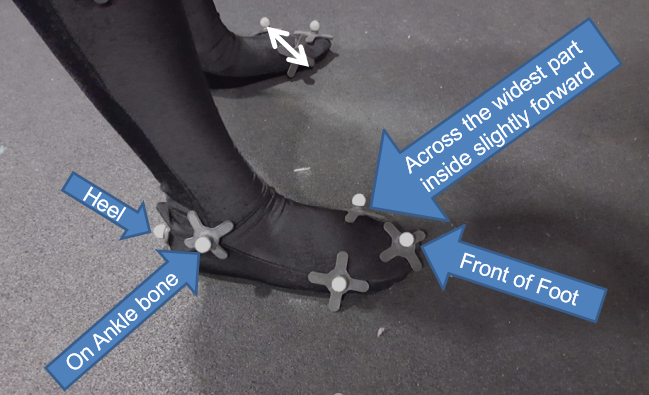
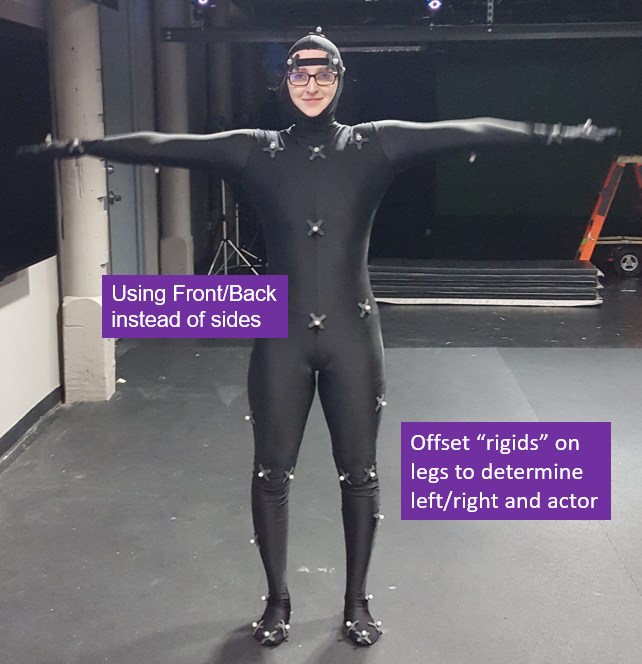
TIP: on the broad part of the foot - ensure the inside marker is further forward than the outside marker) TIP: on the hands, make the top two flat and the two on the sides of the wrist. TIP: the shoulder marker should not move when moving your arm about 45 degrees up from sides The thigh and mid-calf markers are slightly offset to allow the software to distinguish right/left TIP: Wiggle the velcro markers a bit on the suit to help them stick (particularly the hands/feet/knees), ask actor to try and shake them off Why this way? The skeleton in the software is defined in this way so that it understands this configuration. It corresponds to this set up when labeling the markers and creating the skeleton. Note - in Shogun an mcp file is created and saved automatically ... read on |
Thank you to Julie Henninger and Galina Pak for being our actors
Capture ROM
In Shogun Live on the right side you
will see the menu tab for Subject Calibration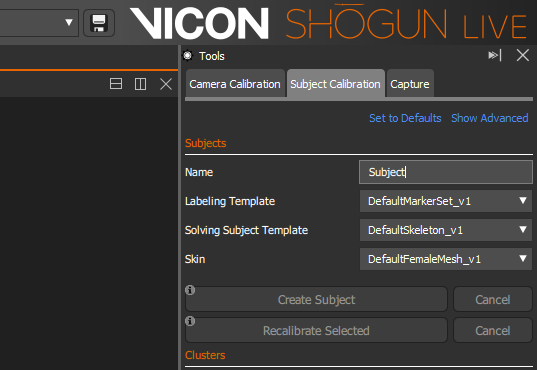
Name your subject
ie. Julie
Labeling Template - select DefaultMarkerSet_v1 (if you
use sides this will be different)
Solving Subject Template - selece DefaultSkeleton_v1 (to
match above)
Skin - currently there are Female and Male mesh
Click Create Subject
T-pose, hit start then accept - your actor
goes thru the ROM movements listed below.
It is important to have the actor go through
the extent of the movement their body will perform during the
subsequent captures.
This looks somewhat like a stretching/yoga/exercise class but
the goal is to inform the software of how much movement will
happen.
The software will process this automatically.
Hit stop only once it is done calibrating. This process is super
fast!
ROM movements - sped up for quick reminder and normal speed
| Start the capture, perform the above
movements and end your capture after live has
completed calibration Correct T-pose has feet straight forward, shoulder width apart, arms out straight like a T, not above or below the shoulders TIP: splaying your fingers may help you remember to keep your arms in the right position - try it.
|