Galton Board
Galton boards came to my attention this past quarter so I decided to make one of my own in Houdini. This post includes tips on dopobject copy, modeling with curves, and general tips about RBD simulation that are understood but not always communicated to the beginning user.
Also on youtube at https://youtu.be/3A_kQDp6wCw
The idea of a Galton board is to demonstrate the bell curve. Dropping balls on pegs arranged in a way such that when the ball is dropped it has a 50/50 chance of going left or right. Generally speaking there are more paths going toward the middle and thus produces the bell curve, or binomial distribution, or normal distribution of balls in the slots below the pegs. (Technically speaking a binominal distribution is discrete while a normal distribution is continuous so it is more accurate to call it binomial since there are a finite number of balls. However, the distribution of the balls approximates a normal distribution.
Reference:
If you google galton board and look at images you will see a large
number of boards including one done with legos as
well as a really cool 3D printed board. I took inspiration from the one at galtonboard.com and in
particular took on the challenge of flipping it which was
challenging with an RBD. Another reference https://www.youtube.com/watch?v=6YDHBFVIvIs.
History:
A Galton board is also called a quincunx or bean machine. English scientist Sir Francis Galton designed a device for statistical experiments. A simple diagram can be found on Wolfram MathWorld.
(Note that they say "Some care is needed to obtain these idealized results ..."). Interesting note, the 3D printed board reference above was based on Galton's 1889 illustrations.
Let's look at the process.
Process:
Started off with a quick prototype, spheres are RBD instanced objects, pegs are tubes and boxes delineating slots at the base. A "cover" and base was created with a ground plane, and two grids approximated as planes in the RBD collision solver.
Modeling of the other parts were simple shapes, mainly curves with polywire and polyextrude, boxes and spheres.
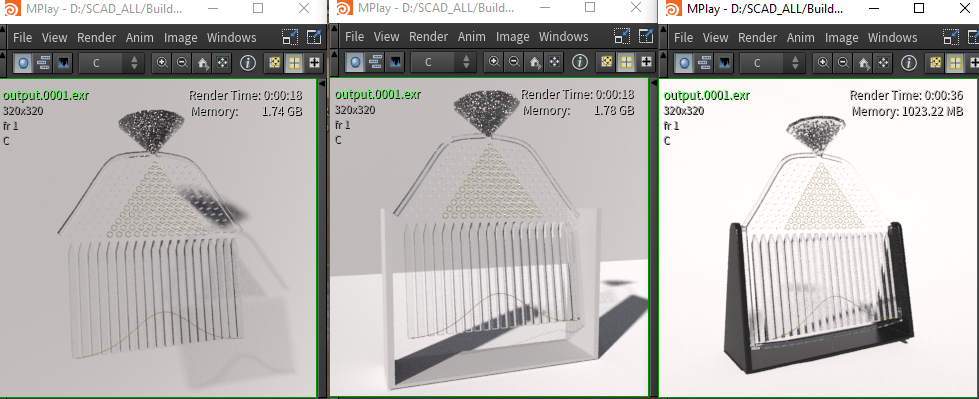
Iteration is absolutely key in any process. Once the mechanics were tested and adjusted using a procedural parameters for my galton board, the process of flipping the simulation and look development were definitely iterative. After a couple of days I came up with the one at the top of this page. Out of the box glass, aluminum and plastic were used for shading and sun/sky for lighting.
Design and look dev progression:
Bell Curve:
The bell curve on the front was created using the formula for a bell curve
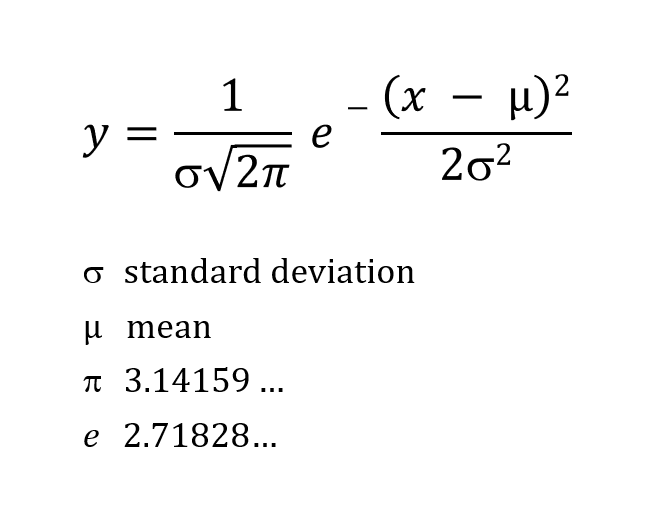
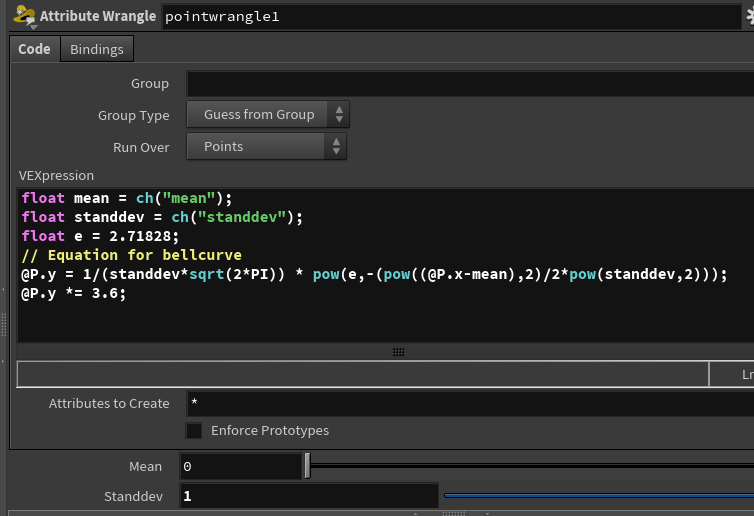
Note the above formula expands to y = 1/(σ * √ 2*π ) * e - ( (x - μ)2 / 2 * σ2 )
(Beware some websites have misinformation)
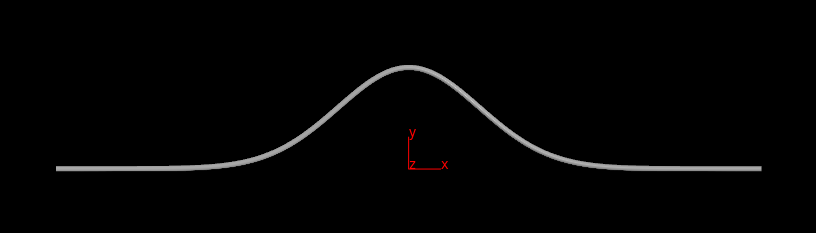
Result of above looks like this (click image for bell curve demo hipnc):
Bullet Solver:
The bullet solver works faster if it can use convex representations of collision objects. This project is a good reminder of the use of dops copy objects
It is easy to have copies of RBD object (use RBD instanced objects) but what about static?
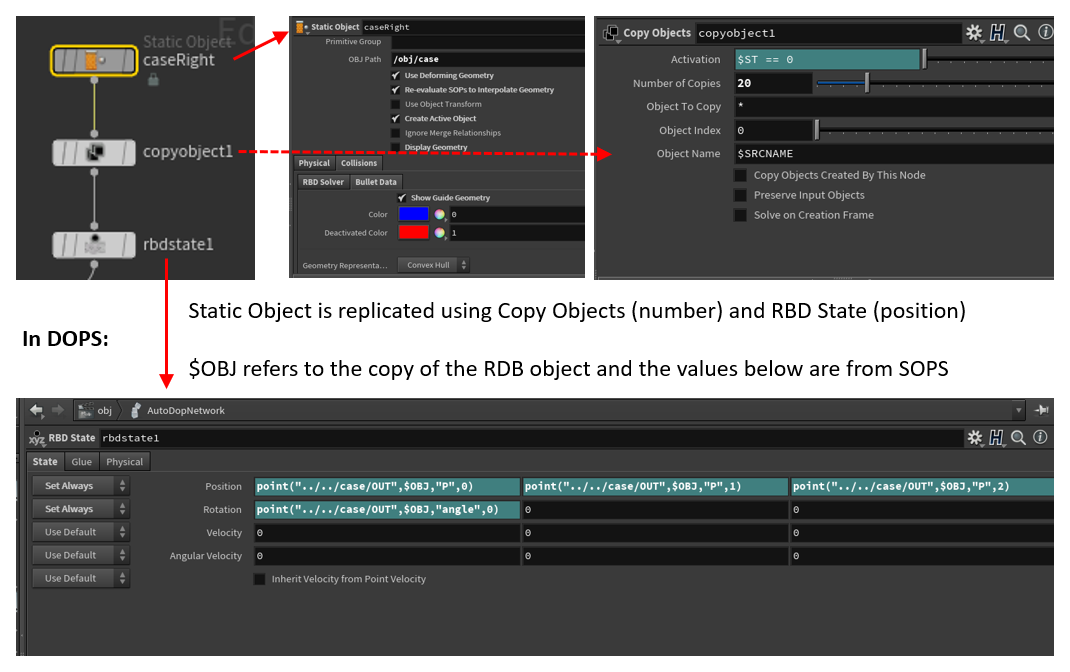
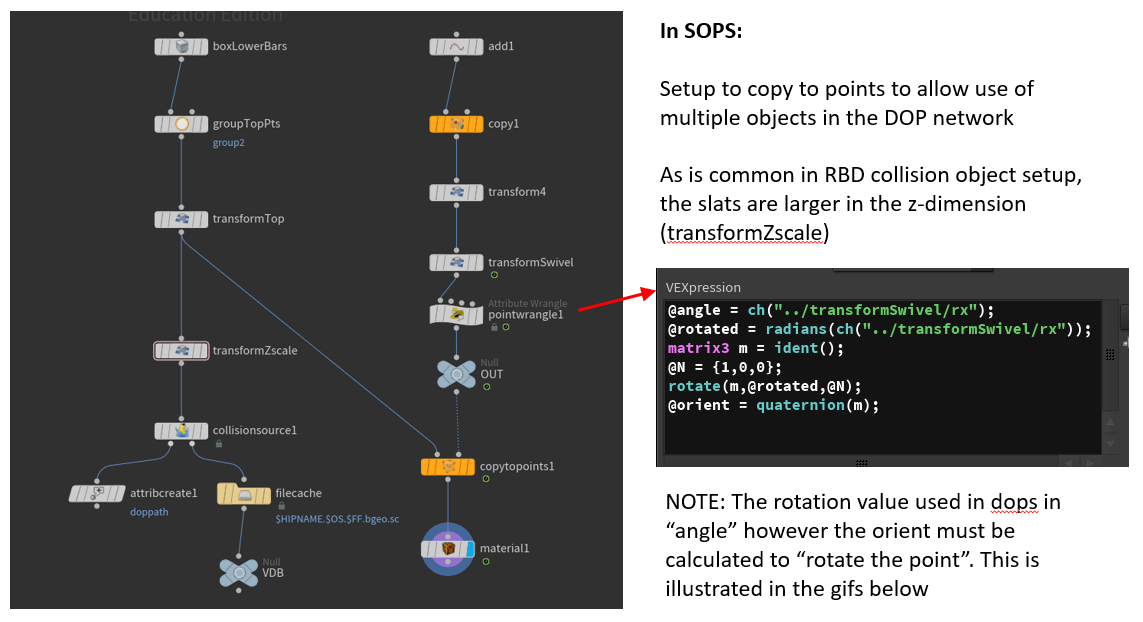
For example, the slots for the balls to fall into are a modified long skinny box. It is possible to simply copy them and use a concave object, however it would be more efficient to do this with a copy objects node. Here is how it is set up:
The original "slat" comes in as a static object. Below are the setup in DOPS as well as in SOPS
REMINDERS:
- check scale - remember that Houdini's units are 1 meter and
weight in kg see Wheel
Dropping for demonstration
- adjust physical properties of your objects
- remember to make your geometry concave if it cannot be "shrink wrapped" or use dopobject copy to use convex - convex or simple shapes are always best
- collision object often need to be thicker than expected, they don't have to be what you render
- model in Houdini
- cache out your sim if you are getting differing results on the renderfarm, also caching out can allow you to preview more quickly