Houdini Buildings
Tags: pointwrangle, facet, fuse, primitive, measure, int, rand
There exist tools for creating procedural buildings in the SideFX toolkit, however it is still an excellent exercise to learn more about Houdini. Keep in mind that here we are reviewing general building techniques for populating a city. When building for destruction more care must be taken with intersections (none), overlapping geometry (none) and tolerances.
The approach you take will depend on your particular building and your node knowledge. On the tips and tricks page there are many files specifically geared toward this goal. This section is designed to more easily access these (the techniques/nodes can be applied to more than just buildings).
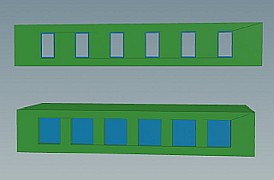
For example, my favorite way of distributing windows evenly spaced across a surface is to use a point wrangle node. The file below contains examples of using hscript, lines and points and point wrangles depending on your comfort level. I advocate the point wrangle but it is not necessary. Point wrangles only came into existence in H13 so prior to that this same technique was used with hscript. Click on the icon for the sample file.
 sample windows Building (see also building video) — windows using expressions and lines and **pointwrangles**, also for-each in 19.5
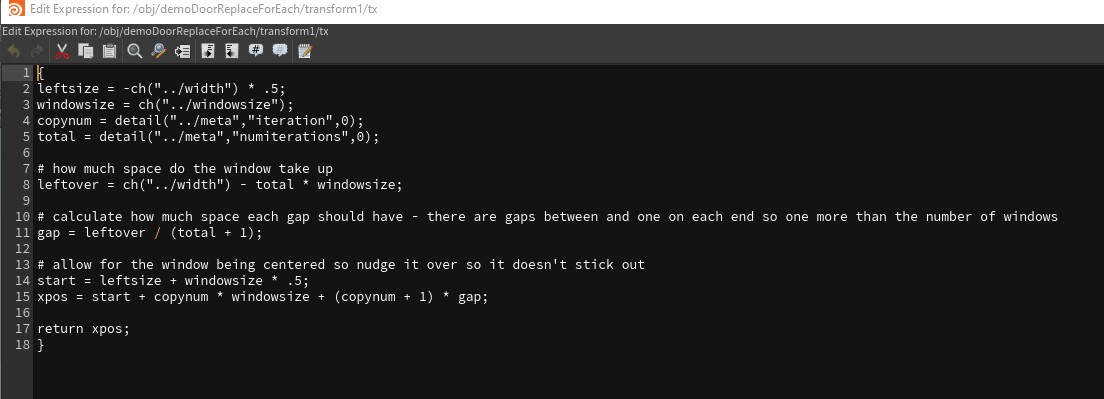
The point wrangle code is as follows (if you are not familiar with point wrangles see section here):
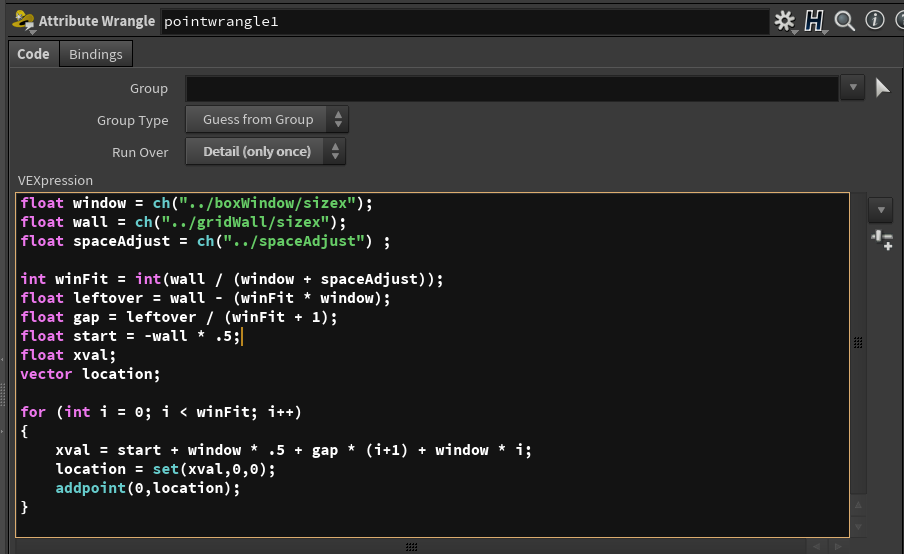
- What this does is take the top level parameter values for the width of the window, wall size and space adjustment to start.
- The number of windows (winFit) that will fit is calculated by dividing the space and we use int to drop off any leftover as we don't want a piece of window
- leftover is the amount of space remaining after you populate with windows (unlikely that they will all fit perfectly with no remaining space)
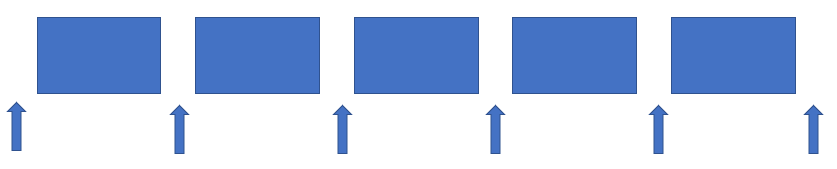
- gap is the space that you want to put inbetween each window and on the two ends, thus it is winFit + 1
- ie. 5 windows will result in 6 gaps
- ie. 5 windows will result in 6 gaps
- start moves the position to the left corner (assuming the wall is centered at the origin)
- xval is calculated and assigned to a location vector where a point is added which will be used to copy the window using a copy or copy to points node
- xval is set to start on the left, adding half a window size (assuming the windows are also centered at the origin), adding the gap times the number of windows before plus one (i+1) (remember that i starts with zero, so the zero-th window has 1 gap before it) and the width of the window (window) times the number of windows that came before (i)
- Note: for efficiency you can "pack" your windows in the copy node
Super easy to add a door, particularly now that we have packed geo.
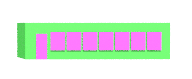
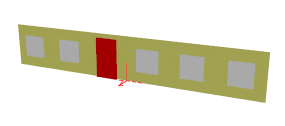 Example of adding a door in place of a window (click image for hipnc).
 hscript version of above technique (highly recommend wrangle!)
You could also use a delete node with a bounding box that is procedurally placed to place a door — many ways as always!
Cutting holes for your windows — so you can inset your windows
 boolean booleanExampleH19.hipnc
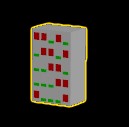 rand, fit01, switchExampleRandWindows.hiplc
Variations on this theme exist in the example file. This works great if your surface is flat, but what about rounded? or Turrets? There are several approaches. One of my favorites was inspired from a "Blowing Apart a Torus" tutorial — what does that have to do with windows you might ask? The facet node. Let's take a look:
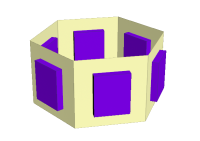 this works too — center of each face (facet node used)
 in more detail using lines or expressions — (measure node used)
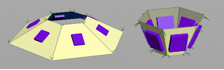 this works for angled tubes as well (facet node, tube node)
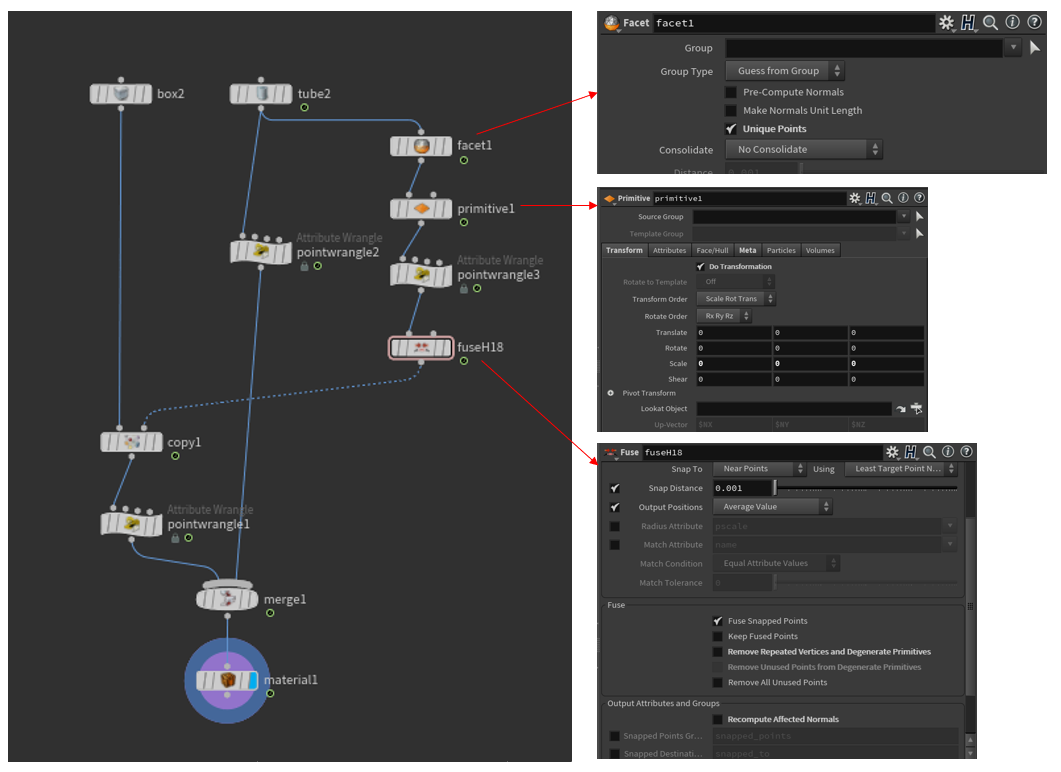
The general idea is to take the geometry and split it up into faces. This can then be used to copy the windows to a single point on that face by shrinking the facet down (primitive node) and using fuse to consolidate the points. Diagrams below show the process of facet, save normal (point wrangle), shrink, fuse.
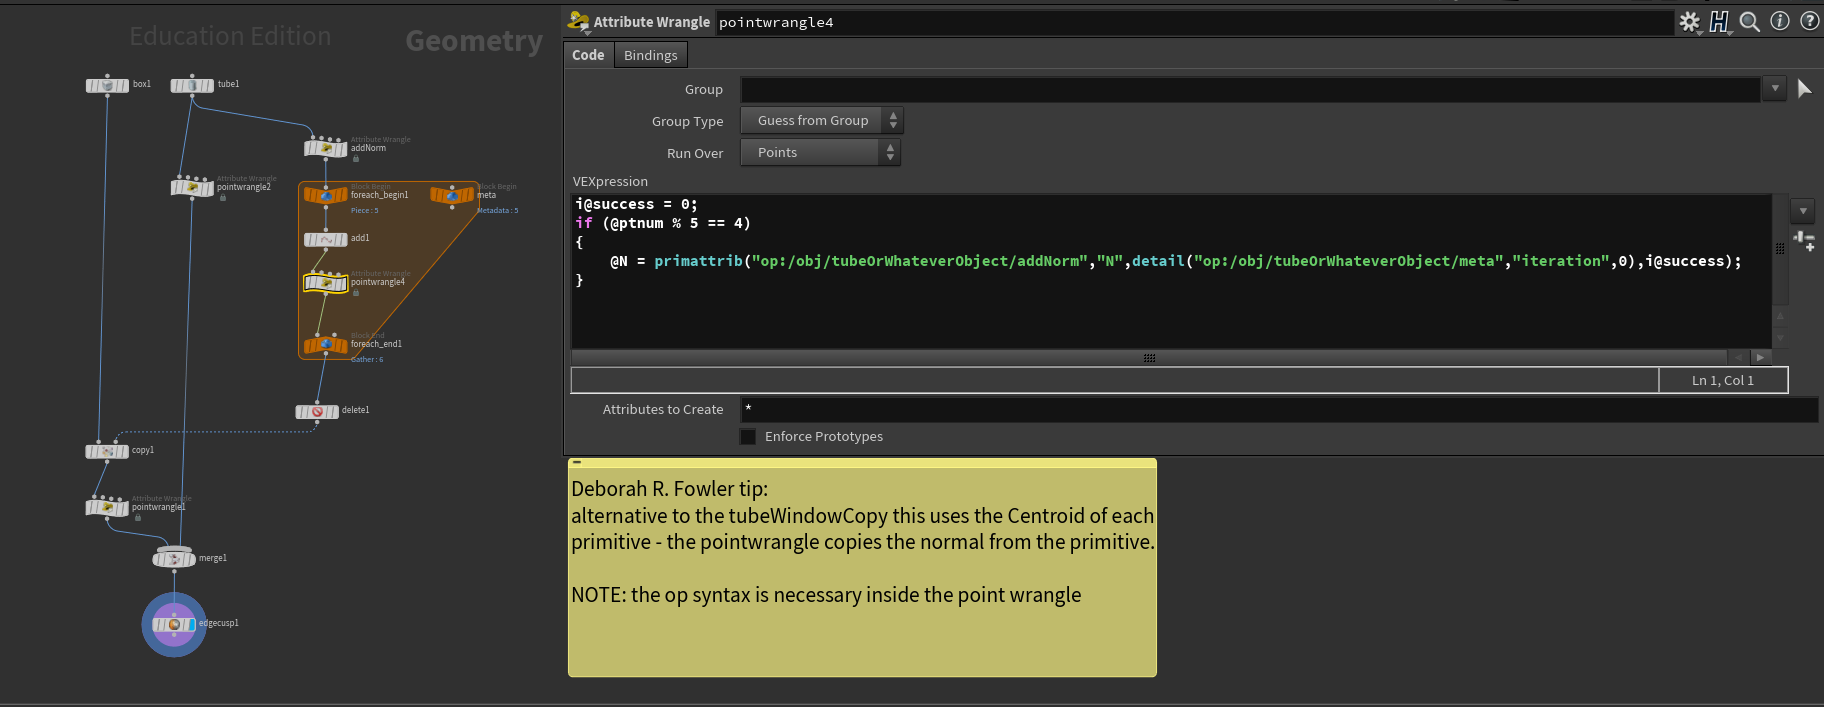
Note that it may be tempting to use $CEX, $CEY, $CEZ as an alternative to the shrink and fuse method — that will work for regular shapes, but not for something such as a platonic solid. The method above is more general. The alternative method does introduce the idea of for-each loops and uses the "op:" syntax in the wrangle nodes. This touches a bit more about wrangles. Click here for details.
This works well, for any number of faces, but right now we are only copying one window per face.
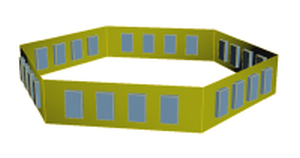
Now we need to go a step further to have multiple windows. This is quite easy by using the measure node:
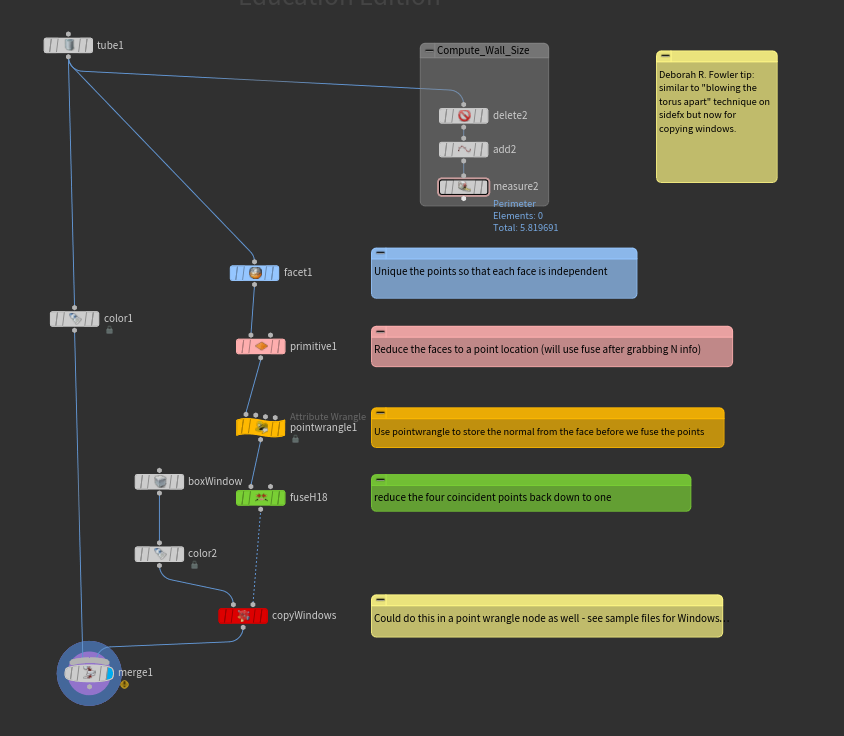
The measure node is used to compute the length of one side by using "perimeter" on one face of the tube. This allows for evenly spaced windows on many configurations.
By using the facet/shrink/fuse method, this will also work for angled surfaces. The only significant change is in the point wrangle node where an up vector has been added so the orientation can be properly computed.
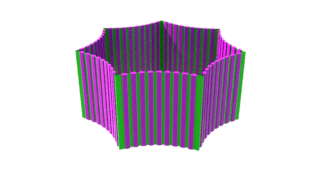
Additionally, you can bulge or curve the wall faces. This is the final example file above. This takes advantage of the polyspline node as well. I used a resample node to get even spacing, however I delete the first and last point of each curve.
There are many methods to apply windows to buildings. There are also differing ways of creating walls, floors, roofs etc.
For more information see Tips and Tricks (stairs, doors, floors, multi-levels of varying height buildings), Math for VSFX (roof in particular — similar triangles), and finally, the video I created on buildings on vimeo