Deborah R. Fowler
click here for Blade 3.1 / 3.3.1 User's Guide
previous step next or cleaning up
see corresponding video (updated to 3.3.1)
Posted Dec 7 2013
Updated April 3 2016
Blade 3.1 / 3.3.1
Calibrating Actors - Processing ROM - TIP:
remember to save the vss
Once the ROM is captured, it must be processed. The ROM has been captured - exercising all rotation extremes for every joint.
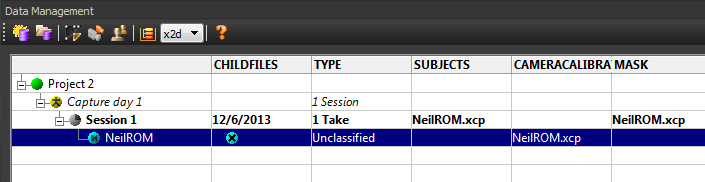
In the data management pane, double click on the round blue icon to load the raw capture data into blade (x2d file). Close the data management pane to allow more screen space.
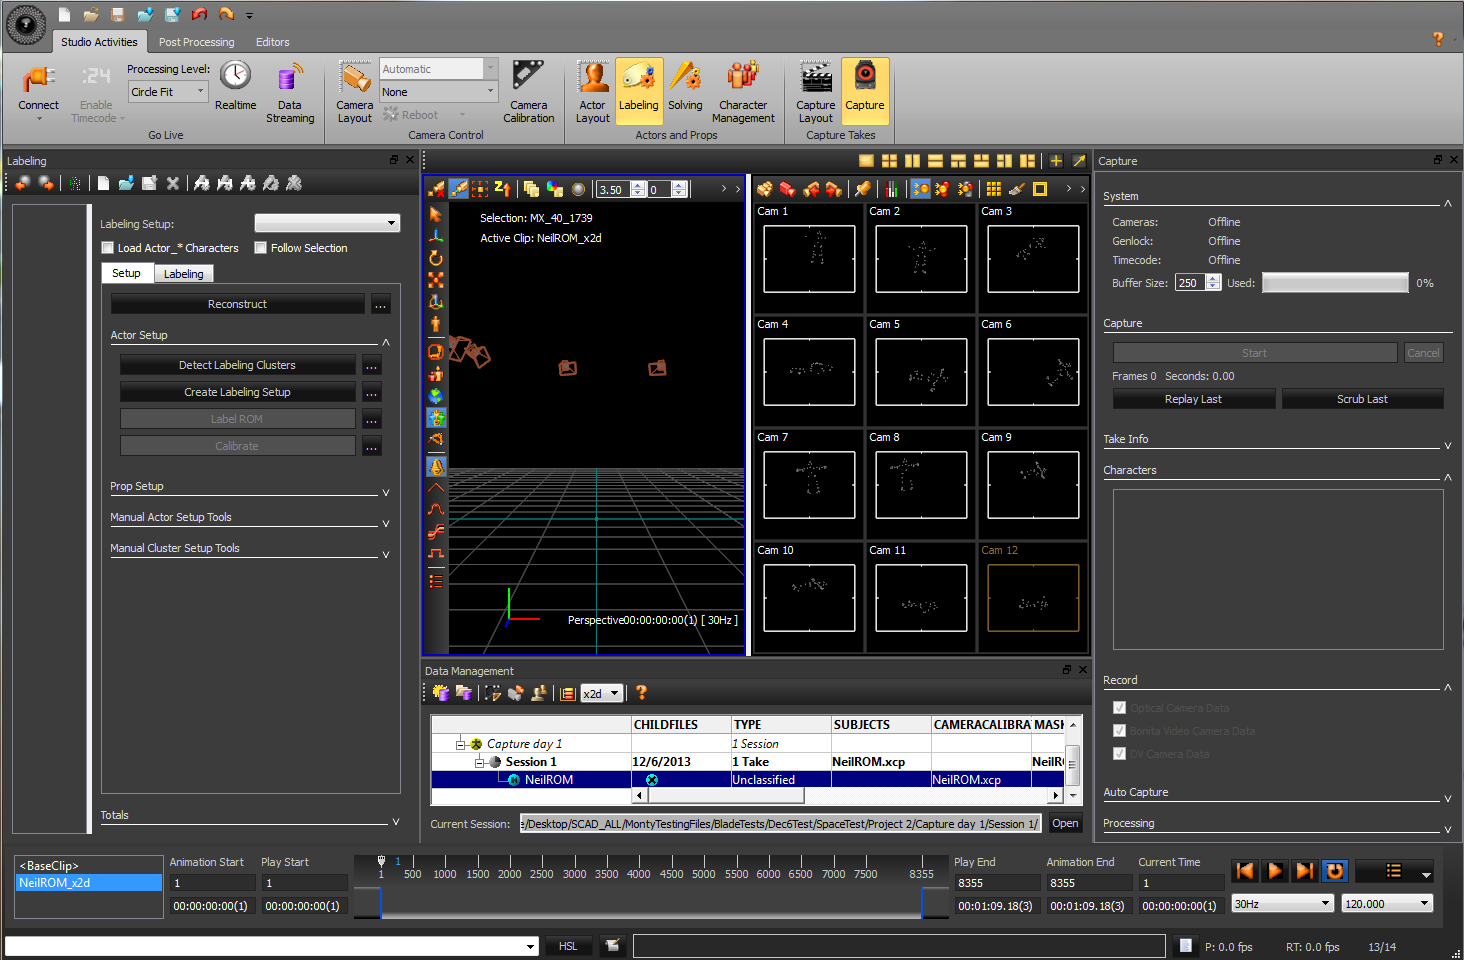
Under Studio Activities, go to Actor Layout.
Blade 3.1 uses a "split character architecture". Actors have a labeling and a solving setup (vsk and vss corresponding files).
- Labeling
- Solvers
Processing the ROM Executive Summary (with
parameter settings and explanation below). Continue steps one at a time.
This is a good place to fix any problems such as swapped markers
- see advanced editing section
below.
Under Labeling:
Under Solving:
Tip: close the solving window while working on labeling, then click the Actor Layout button to bring it up again when you need it. Click here for full screen summary of the steps. |
Labeling
Pipeline steps: When you click Actor Layout you will see the Labeling and Solving window on your left.
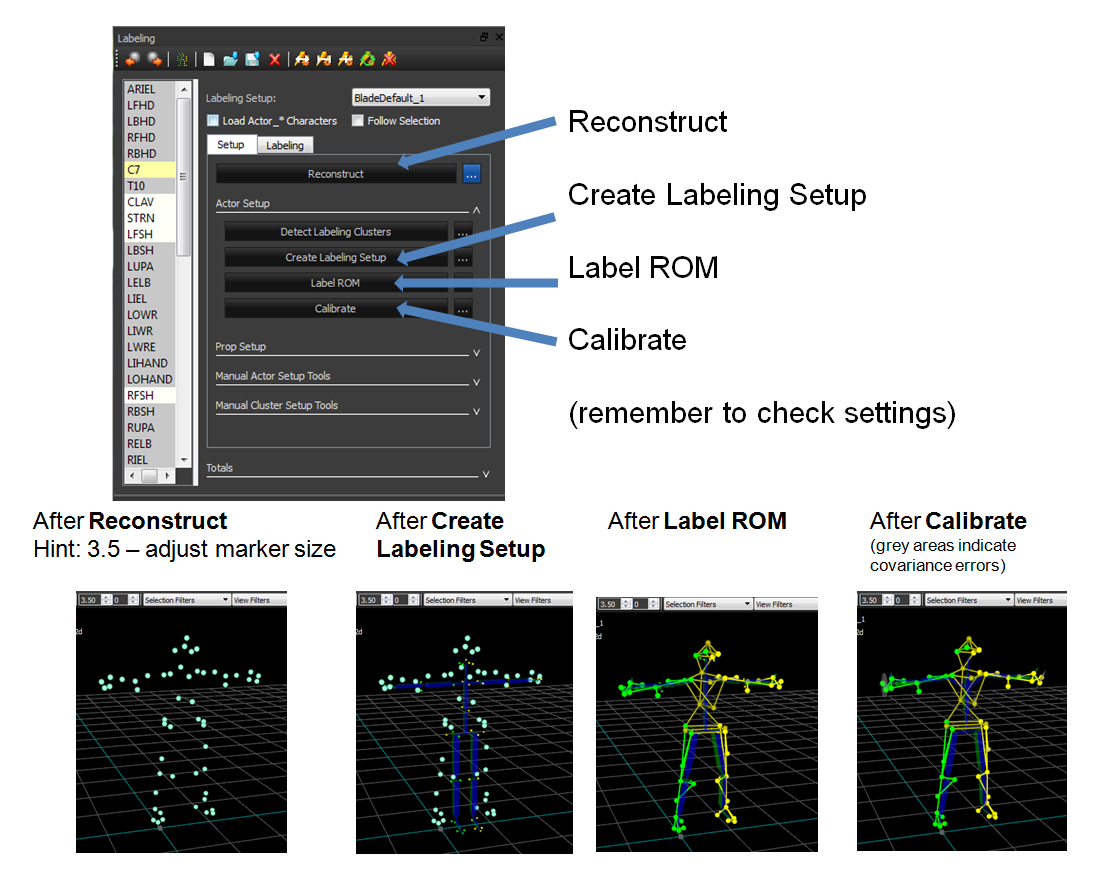
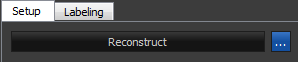
1. Reconstruct
We will follow steps sequentially. It is important to know what parameter settings you are using.
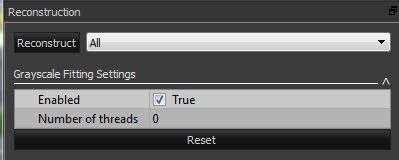
If you click on Triple Dots (options)
 next to Reconstruct
you will see another panel with two labels:
next to Reconstruct
you will see another panel with two labels: - Grayscale Fitting Settings
- Reconstruction Settings.
Under Grayscale Fitting Setting - ensure that Enabled is set to True
Under Reconstruction Settings (Panel just below the Grayscale Fitting Settings)
Minimum Cameras to Start Trajectory is set to 3 (Realtime will always use 3, you can use 2 however be aware of ghosting problems). It can sometimes be helpful to set it to 2 when reconstructing if occlusion is occuring.
Minimum Cameras to Continue Trajectory is set to 2
For our system the Trajectory Fitting Method is set to 2D Tracks (3D will take longer)
NEW: As of version 3.3.1 and the installation of our new support beam, leave the Trajectory Prediction Error at default (150).
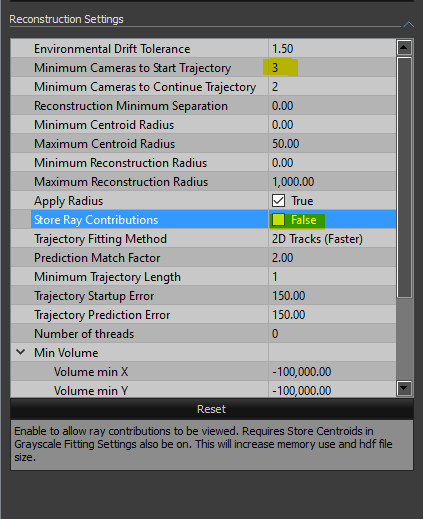
Also, in version 3.3.1 turn off store ray contributions (it increases the file size 3x and is not necessary for our system - it is intended for a larger scale system)
Reconstruction Settings for 3.1 and 3.3.1
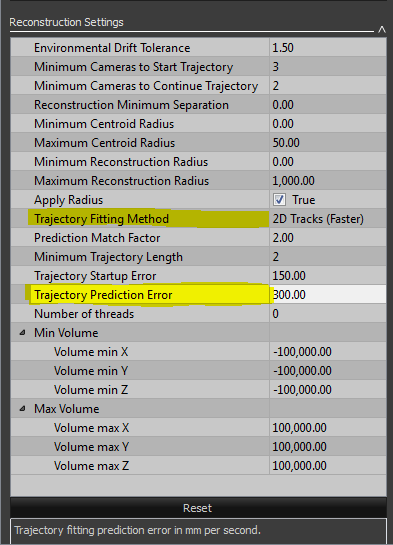
NOTE: these settings are stored in the enf/ini) - when you delete the default ini file, it will regenerate it with defaults.
With these settings in place, click the Options button again to close the interface and go ahead and Reconstruct.
At the bottom of the screen you will see the progress.
Now you should see a dot man in the perspective view (full screen image here).
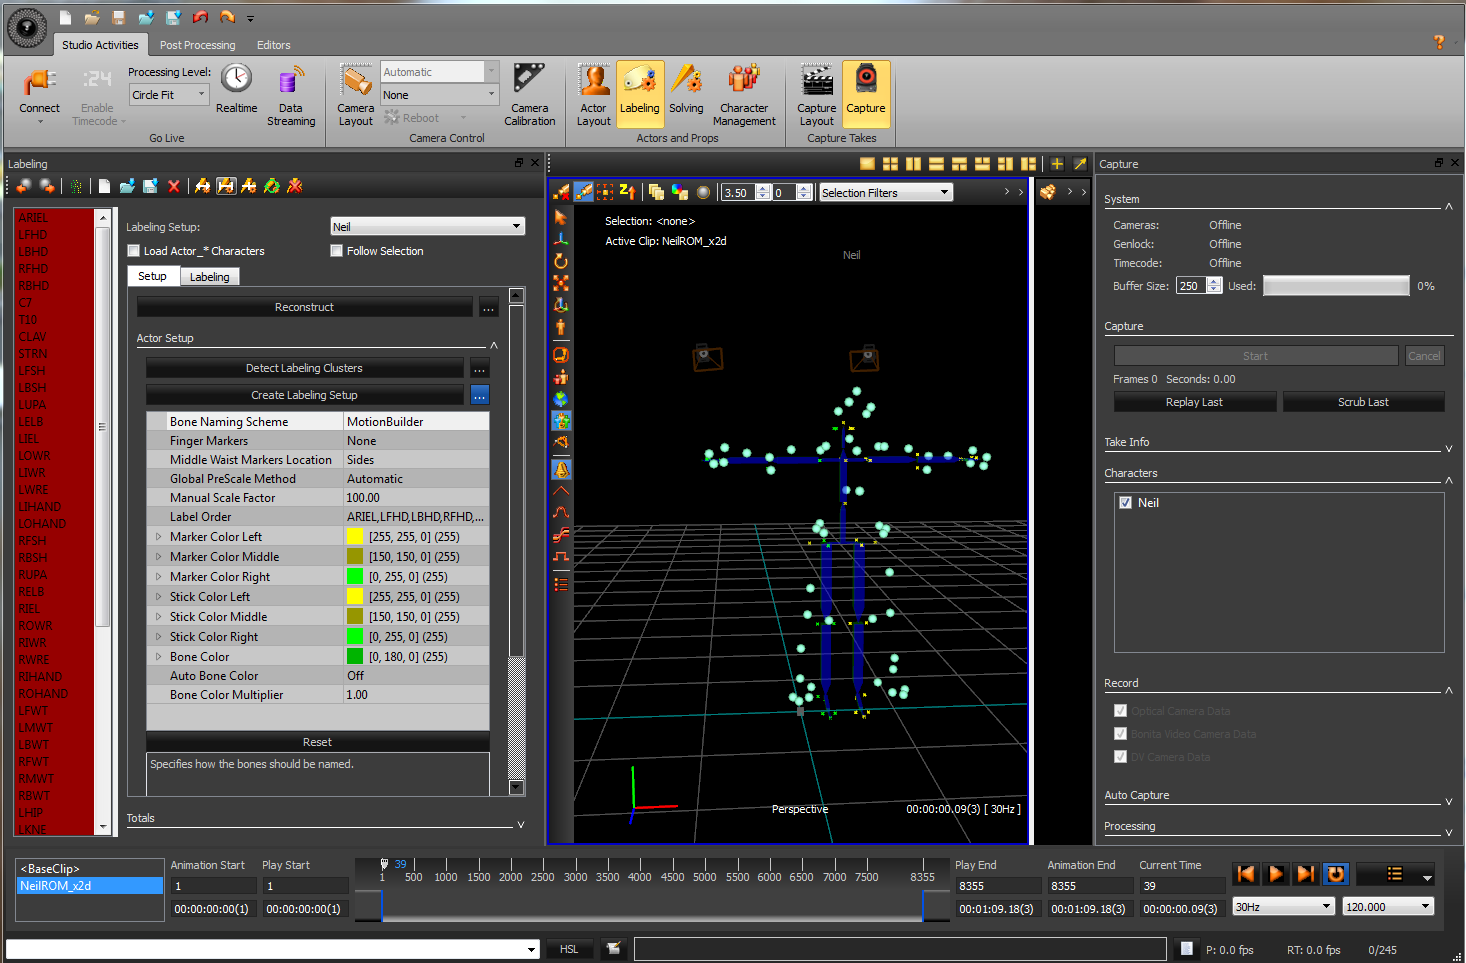
2. Create Labeling Setup
Expand the arrow to see the parameters and make sure these are the settings (if you were using fingers you would have Finger Markers set to Simple3Marker)

Bone Naming Scheme Motion Builder
Finger Markers None
Middle Waist Markers Sides
You may also adjust the colors of your marker if you wish.
With the markers selected (ALT), click Create Labeling Setup. This will bring up a dialogue box titled Actor Name.
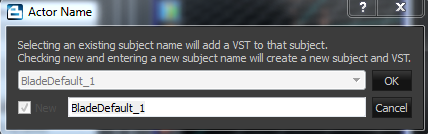
Rename your Actor and click OK. Now you will see a stick man (labeling bones). (click here for full screen image)
In previous versions of blade, this was called AutoVST_MakeVST - VST stands for vicon skeleton template and defines where markers go on teh body. VSK is the resulting calibrated vicon skeleton.
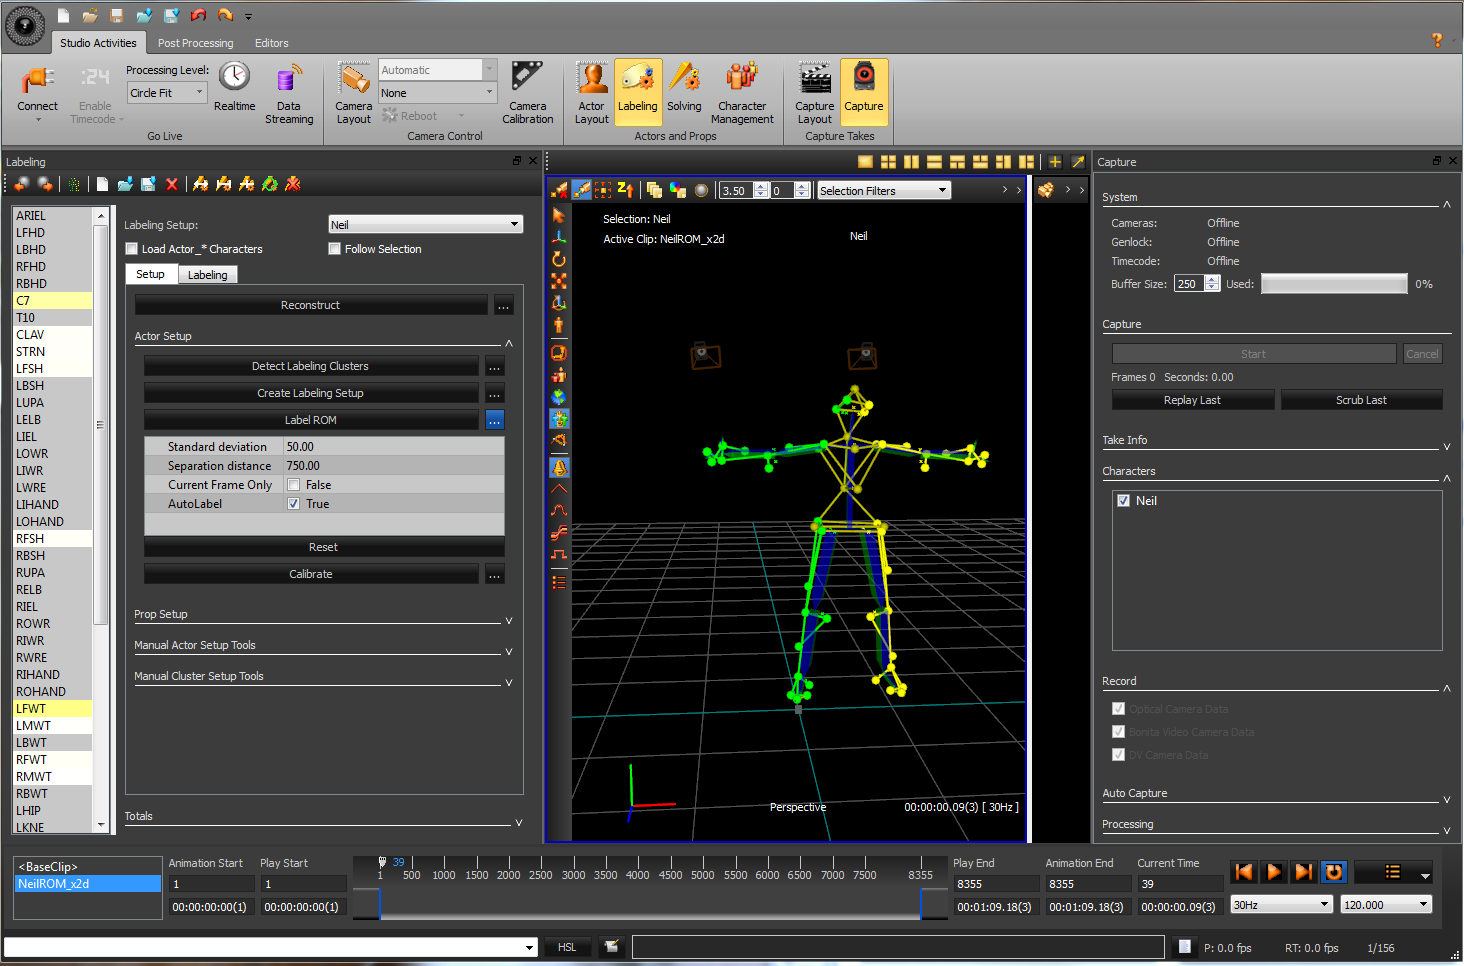
3. Label ROM - nothing should be red - view this, look for gaps - you will now see a connect the dots man. (click here for full screen image)
Note - the stick man will not be attached to the connect the dots man yet - that is normal.
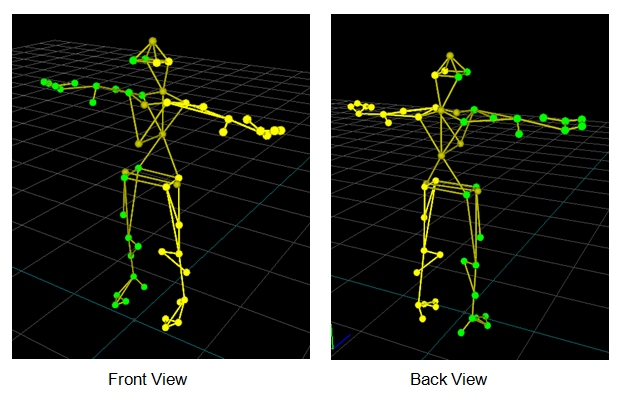
This is what a good labeled body should look like:
4. Calibrate - once you click calibrate - you will see a progress indicator at the bottom left.
Now the stick man will be attached to the connect the dots man. (click here for full screen image)
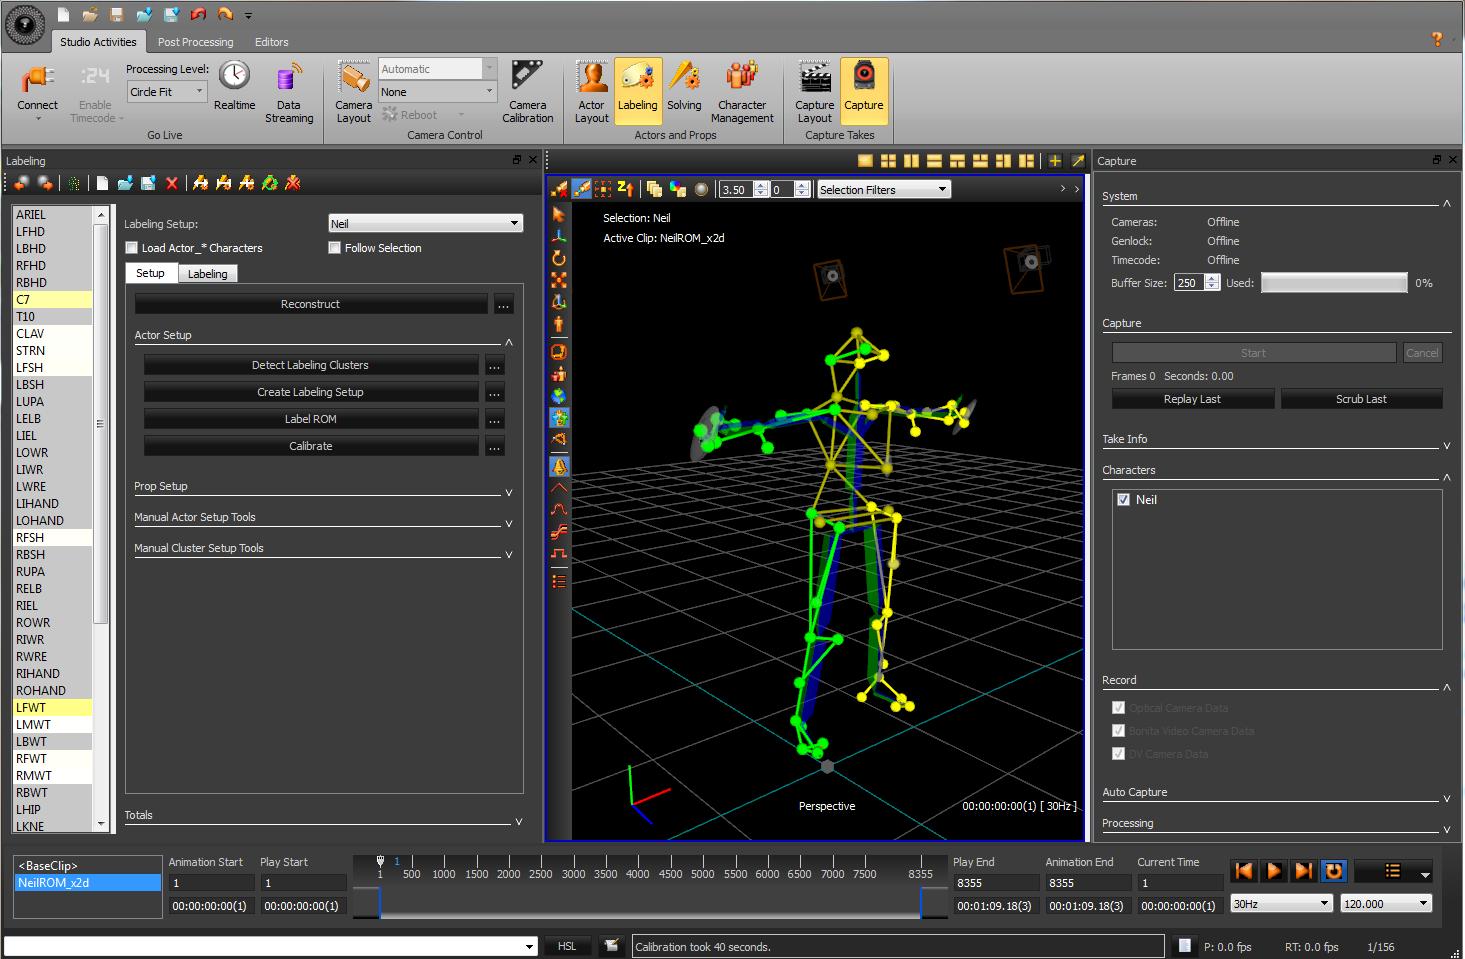
In addition you will see a visual cue representing the covariance value of each marker. Larger circles indicates there may be some problem in the data and usually can be easily cleaning with marker swapping on ranges (detailed below). For example in this figure the covariance looks a little large on the sternum and right hand and we can repair these values.
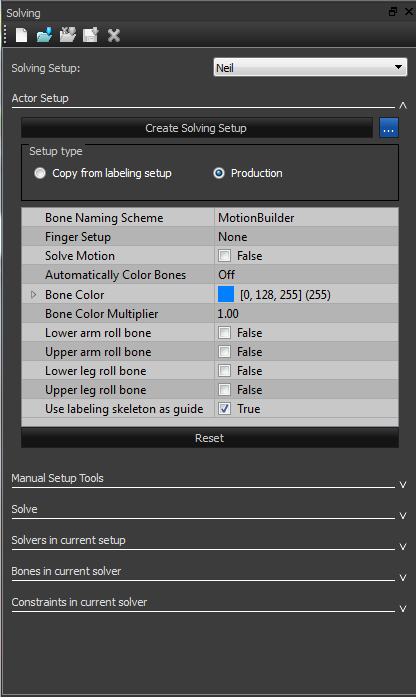
Solving
5. Create Solving Setup - set Production skeleton
Also check that the settings have Bone Naming Scheme MotionBuilder and Finger Setup None.
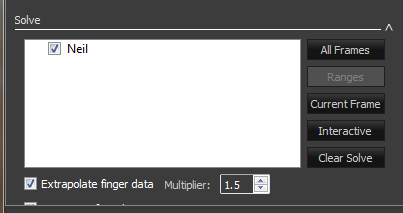
6. Finally click All Frames (bakes bones onto skeleton). (click here for full screen image)
At this point you should save the vss file. You may also wish to solve the hdf file.
The vss is the solving skeleton and will be used in motion builder. The hdf file is the intermediate blade file.
To save the vss you can click the export icon
next is capturing/processing takes or cleaning up