Deborah R. Fowler
Renderman via Massive
Updated on July 9 2014
click here for Motion Capture Resources
In the body page:
- Ensure that the agent geometry has shaders assigned for the pass under the “shaders” tab. The dialogue box will bring up renderman shader options.
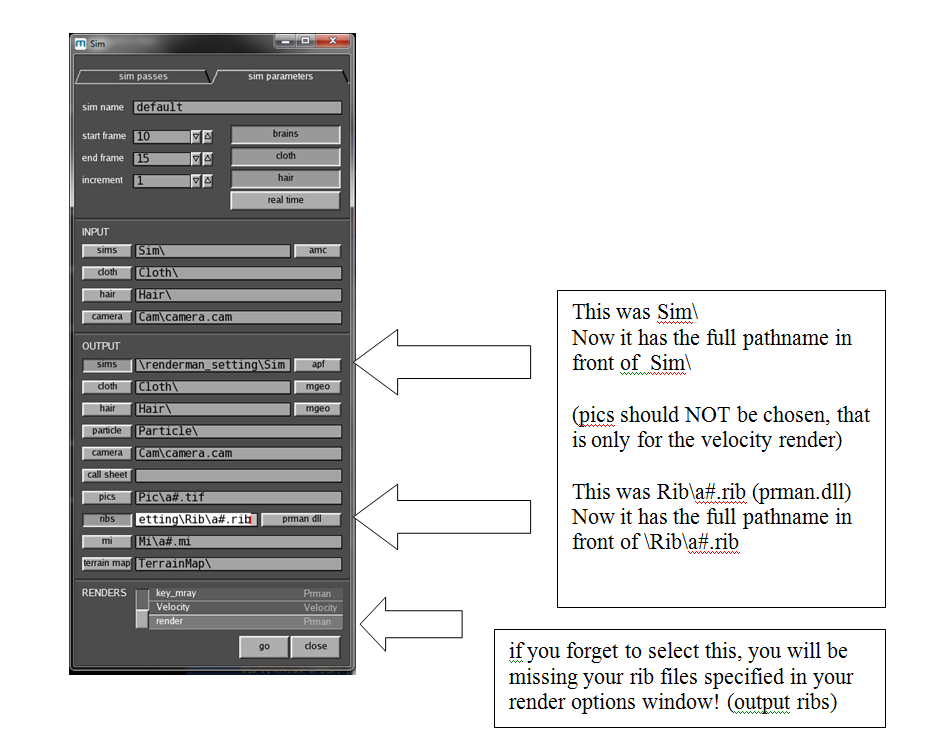
In order to get multiple frames, go to the Run menu, pull down and select Sim. In Sim you will see a “sim parameters” tab. Toward the bottom in the OUTPUT section, there are two buttons to push is, the “Sim” button and the “Rib” button. This produces the sim and rib files that are essential to produce the render. Specify the full pathname to where you have created a “Sim” and a “Rib” folder. In in the following manner:
IN
ADDITION:
Under Options/Renders
NOTE: Do not put spaces in your folder names. If you do, your pathnames will not work in renderman. (It will also cause problems with saving files in Massive)
(This is the default value chosen for the premade agents and is not appropriate for our objects. Set this to .1
(Don’t set it too low ie. .01 is NOT a good choice – you may start to see “lines” on a flat terrain).
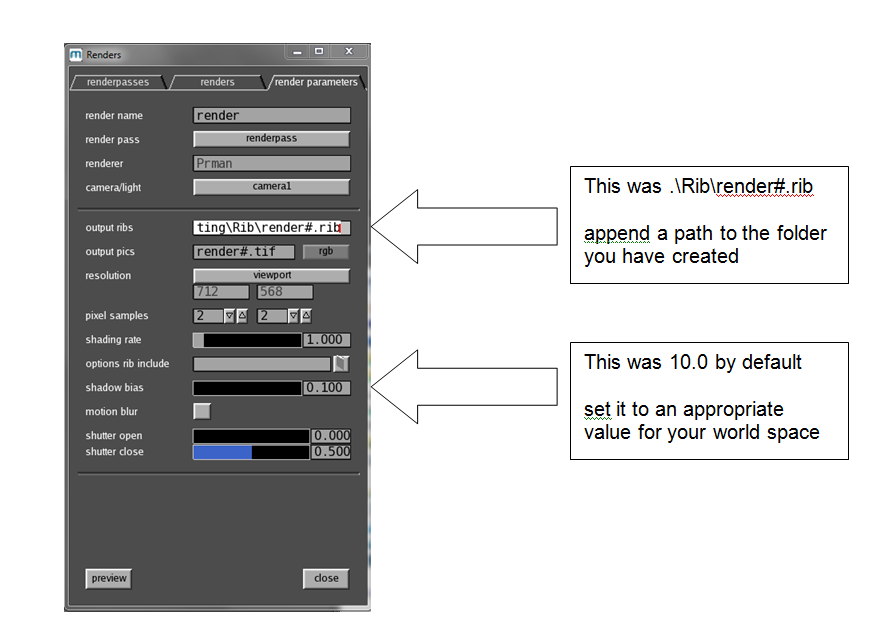
Once you are ready with these settings,
go back to the Sim window and, with the render selected, hit
go.
This will create three things in the folders you have defined:
In the Sim folder:
frame.10.apf
frame.11.apf ….
frame.15.apf
In the Rib folder:
a0010.rib
a0011.rib …
a0015.rib
Also :
render.0010.rib …
render.0015.rib
As well as a_terrain1.rib
The render.0010.rib … render.0015.rib files are the master files, and they reference the other files to produce the image.
In order to start prman, copy over the script that is in the materials folder to this folder.
Then simply type mrender.bat
on Windows or run the script (./scriptname on linux) and this
will produce the resulting render.0010.tif …
render.0015.tif files in your directory. Note
here we have 10 to 15 as that is what the start and end frames
are in the sim window.
So to recap: 1. Create a Rib and Sim folder 2. Under menu Run-Sim-Sim parameters tab- push in "sim" and “rib” and specify full path name of folder (leaving the # to indicate the frame number)
3. Specify under Options/Render/render parameters the
output ribs file path
5. Save your files!
7. Copy the script from
MATERIAL/Rendering/MassiveRenderScriptLinux into your Rib
folder. |
NOTE: save agent and
scene (.cdl and .mas) – the rib and sim files refer to
the files so if you want your sim render to look like your
preview render you need to make sure the files are up to date.
It’s a good habit as you are working in Massive to save your
agent and setup as you go, and save versions that work.
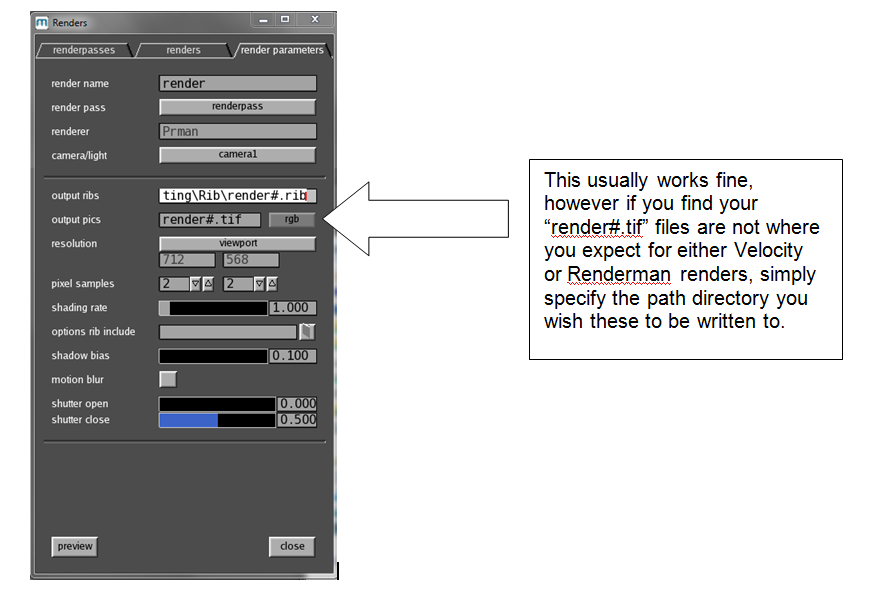
ADDITIONAL NOTE: default
behavior for output pics went to the directory of your session.
If this is not happening, here is what you should do: