Deborah R. Fowler
Houdini Lighting
Render Basics
This is an extensive topic, but the intention here is just to get
you started with a simple scene. There is so much you can do with
lights, shaders and rendering in Houdini! There is also a new
tutorial by Scott Keating called the Mantra
User Guide.
Assigning a shader:
There are two places shaders can be assigned to an object - at
the container level - which means everything in that container is
affected. (Not the preferred method - it is what happends when you
drag a shader to an object for example).
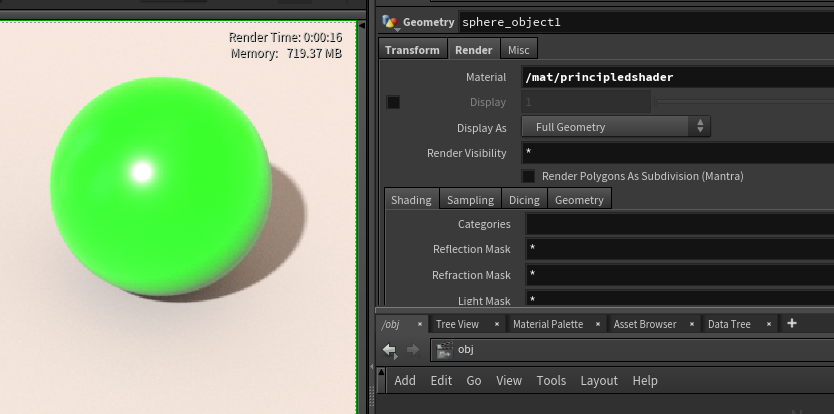 The shader is
referenced in the Material parameter in the Render Tab of the
container node
The shader is
referenced in the Material parameter in the Render Tab of the
container node
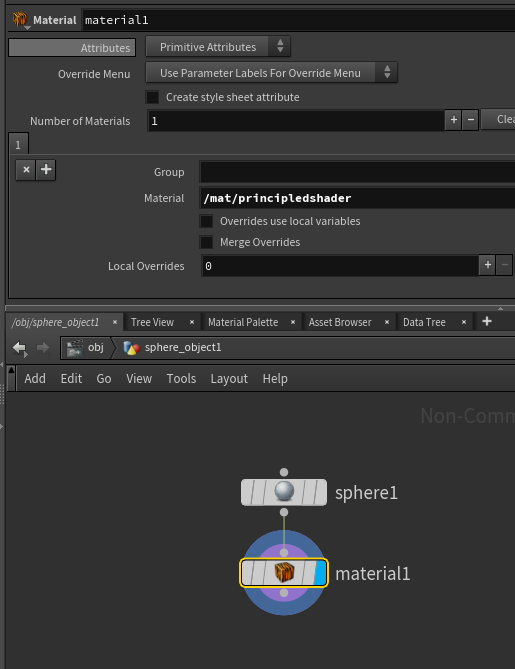 The preferred shader
assignment is to use a material node in the network and assign the
shader in that specific node.
The preferred shader
assignment is to use a material node in the network and assign the
shader in that specific node.
Later on you will also see groups used to assign shaders to groups
of objects or even parts of objects, but for now this will get you
started.
Shadows:
Lights in Houdini are computed using Ray Tracing. Do not believe outdate forums that say that raytracing is too expensive for shadow computation - it is no longer valid. A few things to mention:
- you can decide what is and is not shadows (similar to light linking)
- you can use shadow color (this really should be defined by the
fill lights, but may in some cases want to add a wee little
touch of color - example below as to what I mean by wee little).
Parameter was added as of H12.5 and up.
- you can reduce the shadow intensity (again use sparingly)
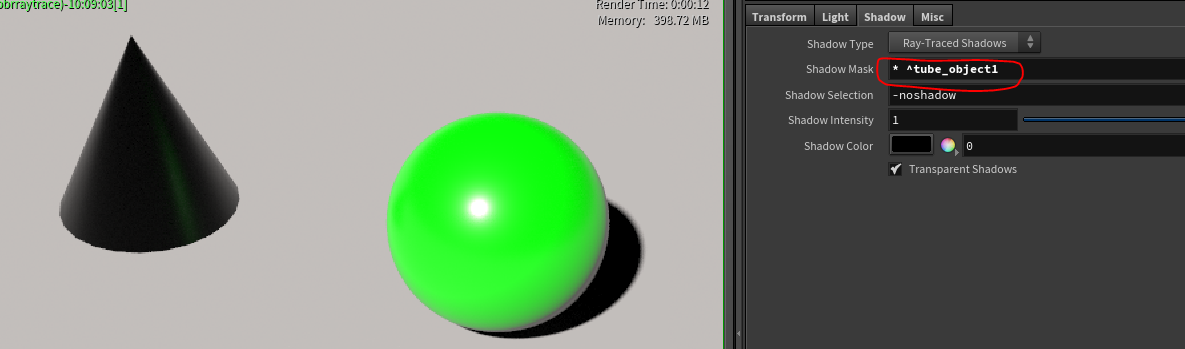
Here the illumination and the shadow has been turned off on the tube_object1 by the expression ^tube_object1
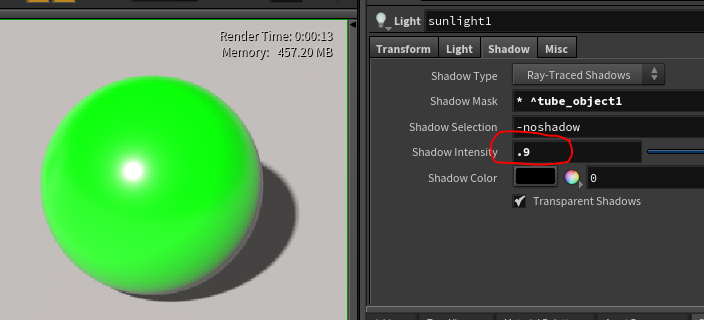
The shadow intensity is lessened to .9 allowing light to "bleed" into the shadow area. (As a rule of thumb you should never go below .8)
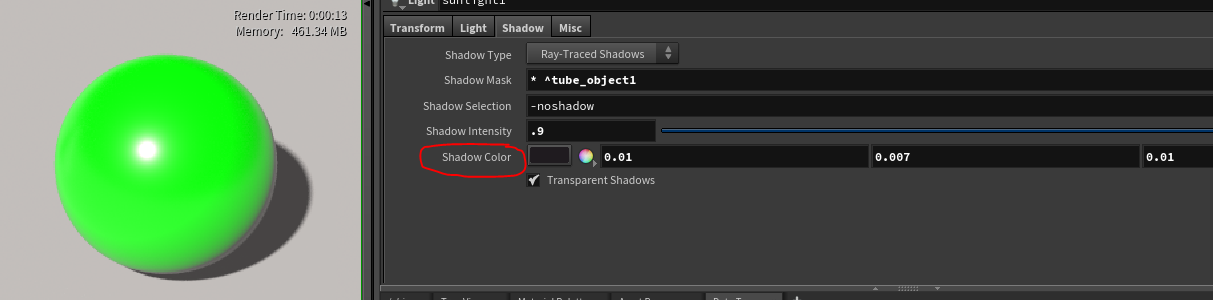
Color has been added to the shadow in a very small amount.
This parameter is useful for two things:
- when the lighting is perfect but the shadow is a bit drab or dingy
- when you are debugging - crank it up to red for example
Render Tab on the Object Node:
Worth mentioning at this point (although you are likely not to
have to use it in a basic set ups) is the Render Tab on each
object container node. Here you are able to select objects that
you may want to exclude from a reflection or refraction for
example.
 For
light selection use the Data Tree (see section on Light Instancing)
For
light selection use the Data Tree (see section on Light Instancing)
Render Nodes:
Next, let's take a quick look at the
render node - in our case - mantra
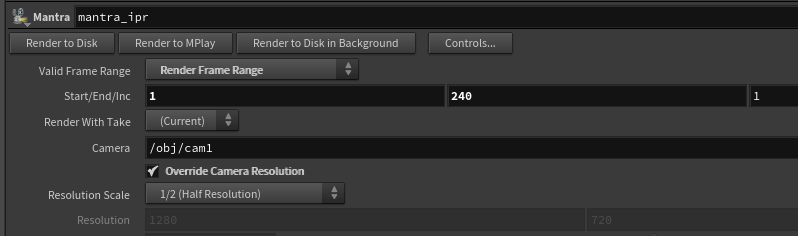 At the top,
you can set a Render Frame Range. At first these will be set, delete
parameter and set them to the desired value.
At the top,
you can set a Render Frame Range. At first these will be set, delete
parameter and set them to the desired value.You can select Render to Disk (writes to a render folder), Render to MPlay (similar but better than fcheck) or Render to Disk in Background (so you can keep working)
Override Camera Resolution you should be using all the time. Do not waste time waiting for feedback when you can render smaller and see what you need.
Rendering / Sampling Tab
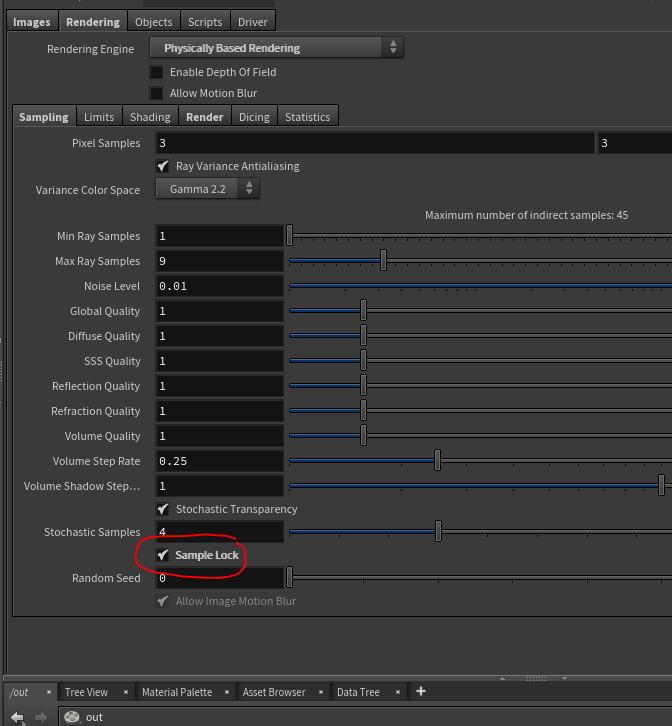 Set
your Rendering Engine to Physically Based Rendering (PBR)
Set
your Rendering Engine to Physically Based Rendering (PBR)You will be using this for 99.99999% of renders in mantra. There is a long history here but I will summarize to say that the selections here are a combination of algorithms to compute the shaders/lights and rendered pixels of an image. The most popular method currently is Raytracing with physically based materials and light shaders.
The most common tabs you will use under the Rendering tab are Sampling (shown on the left) and Limits (see below)
For the moment, you may leave the other settings. Those will be discussed in the render optimization section.
Min/Max Ray Samples are usually tweaking before turning up Pixel Samples but we'll discuss later.
You will want to check on Sample Lock.
Rendering / Limits Tab
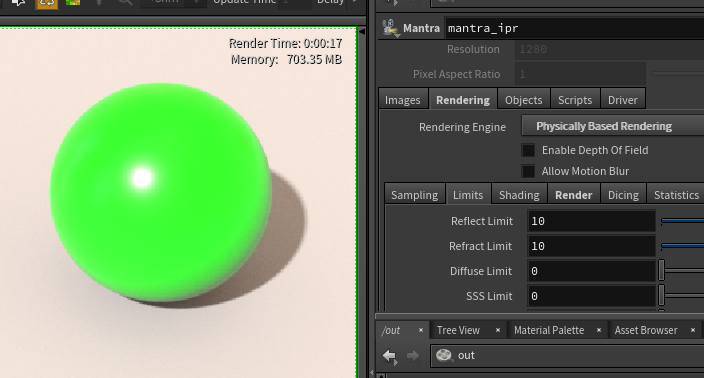 In the
Rendering / Limits tab you will want to turn up Diffuse
Limit from the default value of zero to 2.
In the
Rendering / Limits tab you will want to turn up Diffuse
Limit from the default value of zero to 2.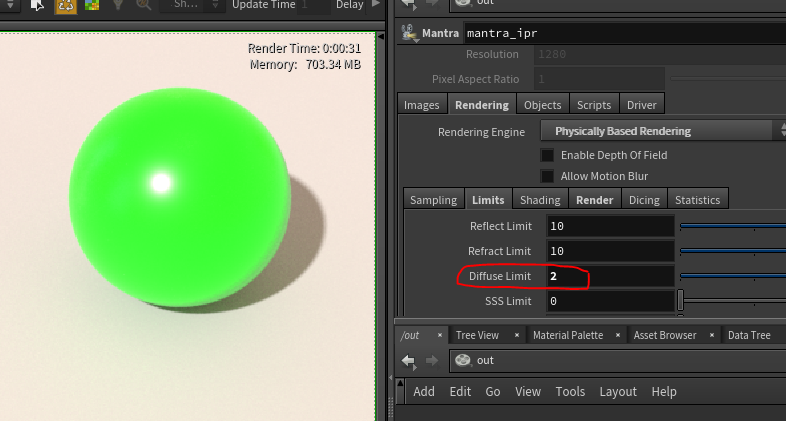 This example
shows that with Diffuse Limit, and a simple Sun/Sky
lighting set up, we are getting some color bleed, bounced
light and occlusion.
This example
shows that with Diffuse Limit, and a simple Sun/Sky
lighting set up, we are getting some color bleed, bounced
light and occlusion. 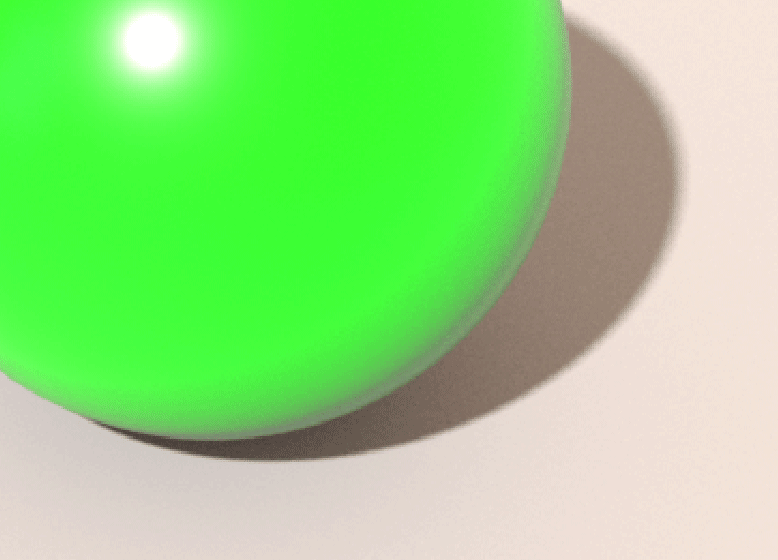 The difference can
be more dramatically seen in this gif toggling between the
two.
The difference can
be more dramatically seen in this gif toggling between the
two. That brings up two important lighting tools:
- Squinting (yes squinting)
- Toggling between subtle changes