Deborah R. Fowler
Houdini Lighting
Render Passes / Layers and Tips
Posted Dec 13 2017
If you wish to create multiple passes in Houdini it's easy!
(Rule of thumb - depth of field - do it in comp, motion blur - do
it in render)
There is a distinct difference between a render pass and a render
layer. Passes are when you split up lighting layers for more
control in compositing. Layers are when you split up geometry,
typically to reduce render time. [Passes == lighting, Layers ==
geometry]. Keep in mind that you could have render passes for
render layers.
Both are super easy to do in Houdini:
Render passes:
In the mantra node, under Extra Image Planes you
will find that you can add many different attributes to your exr
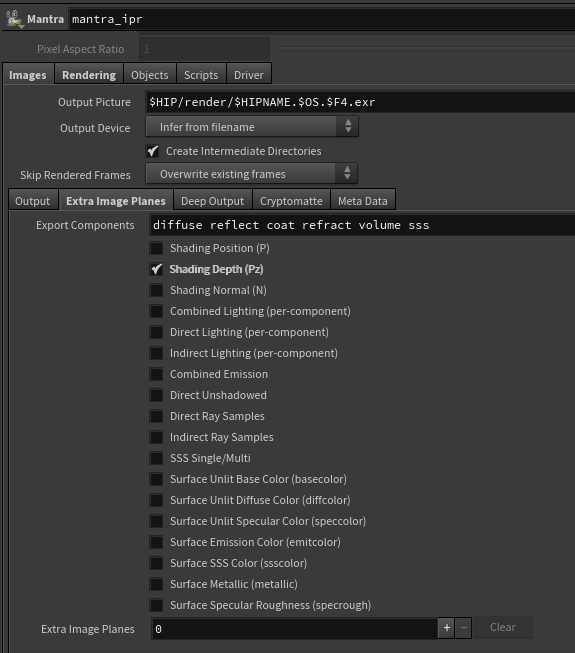 This is the Rendering
/ Extra Image Planes tab
This is the Rendering
/ Extra Image Planes tab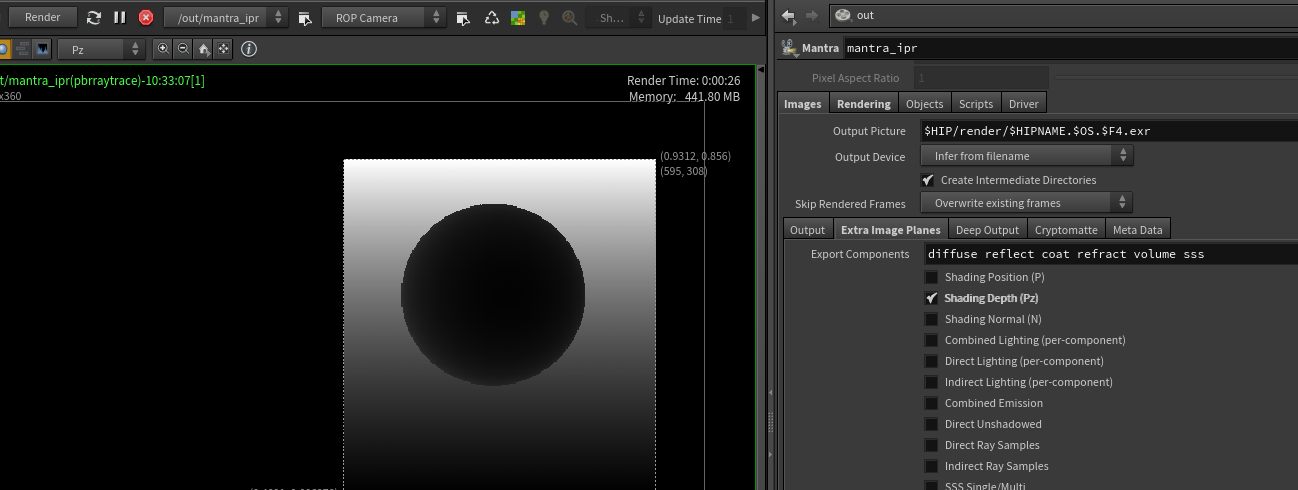 The check by
the Shading Depth (Pz) adds depth information to our image to be
used in compositing to provide Depth of Field.
The check by
the Shading Depth (Pz) adds depth information to our image to be
used in compositing to provide Depth of Field.No need to render DOF.
 In this example, Pz as well as
Direct Lighting (per-component) checked yielded the layers you see
on the far left
In this example, Pz as well as
Direct Lighting (per-component) checked yielded the layers you see
on the far left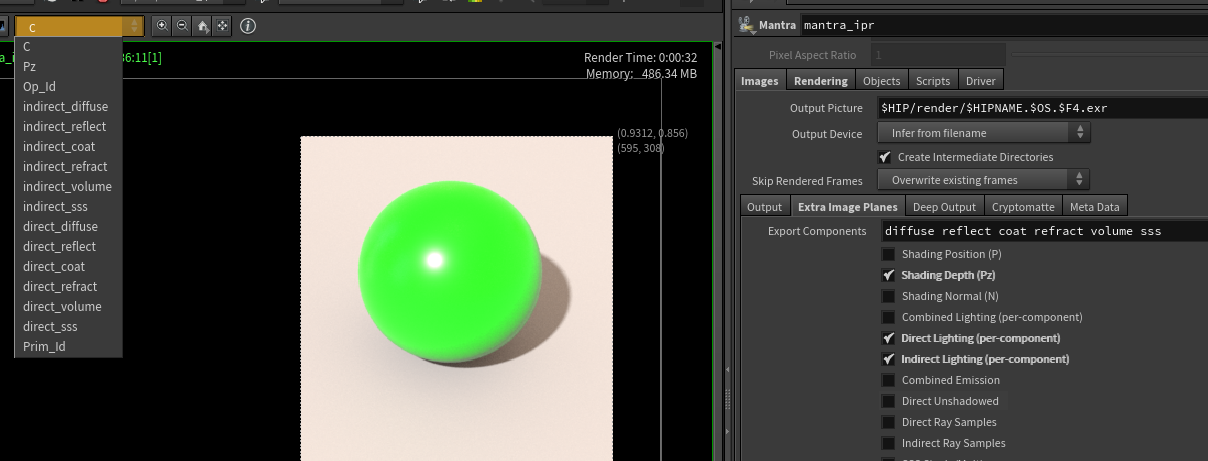 In this example, Pz
as well as Direct and Indirect Lighting (per-component) checked
yielded the layers you see on the far left
In this example, Pz
as well as Direct and Indirect Lighting (per-component) checked
yielded the layers you see on the far left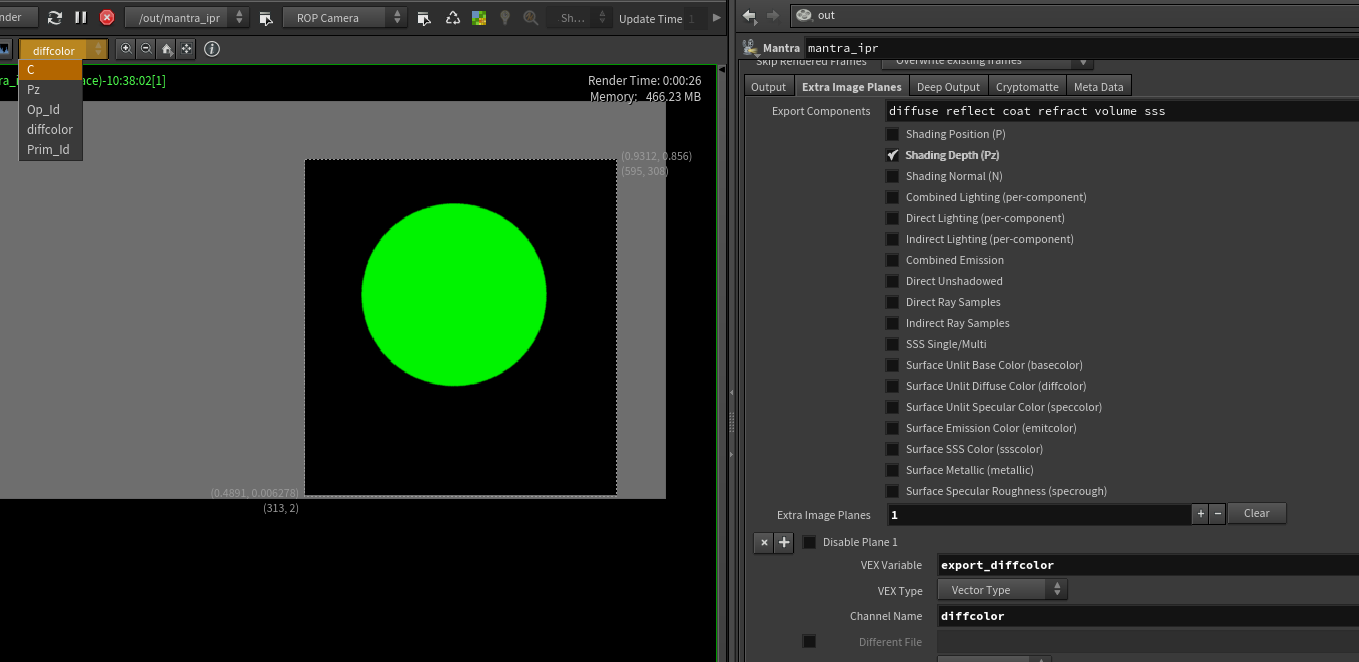 You can also specify
exactly the attribute that you want generated. In this case, using
the selection, diffcolor was choosen from the dropdown menu.
You can also specify
exactly the attribute that you want generated. In this case, using
the selection, diffcolor was choosen from the dropdown menu.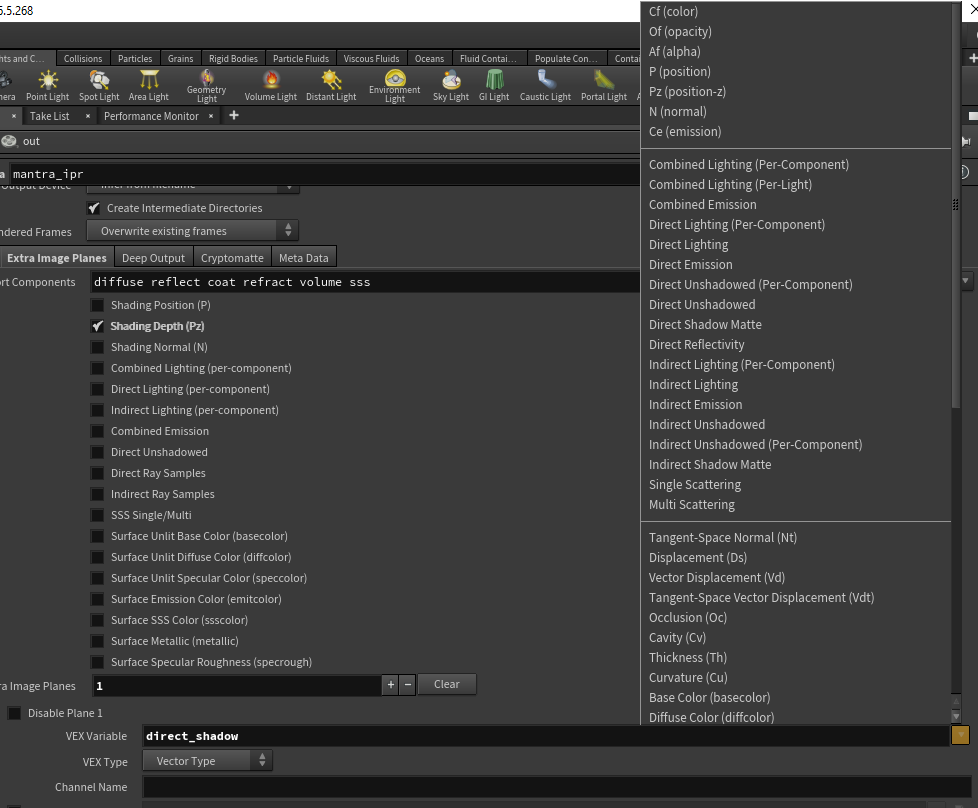 The dropbown menu
choices are extensive and it is very easy to output extra
information into your exr giving you extensive Render passes.
The dropbown menu
choices are extensive and it is very easy to output extra
information into your exr giving you extensive Render passes.Render layers:
 In addition to the extra image plane.
Geometry can be manipulated in many ways. Render layers can
be created.
In addition to the extra image plane.
Geometry can be manipulated in many ways. Render layers can
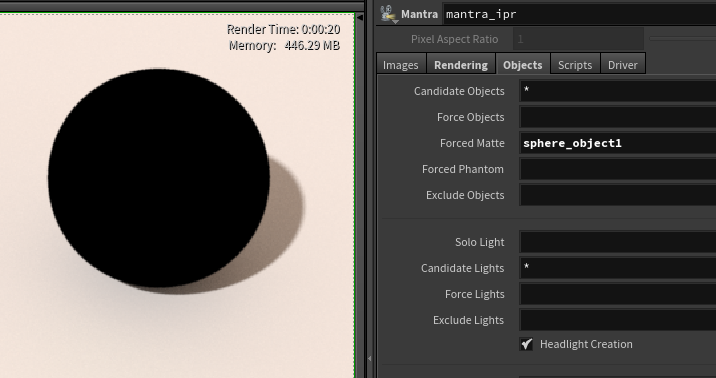
be created.The categories are fairly descriptive. The first one, force objects, is very convenient for turning off heavy geometry on display but forcing it to be on at render time (Houdini has multiple ways of doing this).
Force Matte is shown here, "Cutting out the geometry".
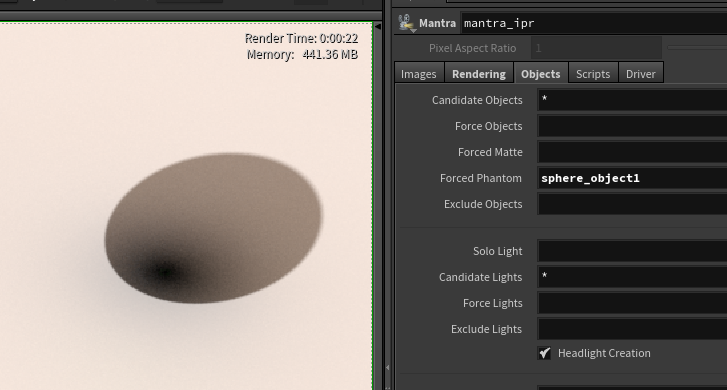 Force Phatom is shown here, where
the shadow is rendered, but not the object.
Force Phatom is shown here, where
the shadow is rendered, but not the object.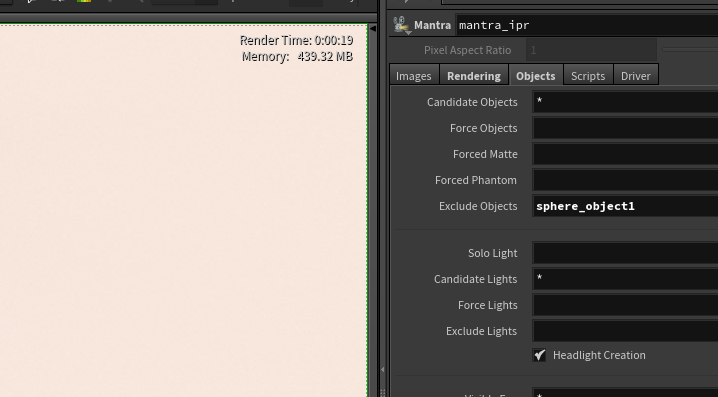 Excluded objects (great for nodes
that you are working with but never intend to render)
Excluded objects (great for nodes
that you are working with but never intend to render)And just a reminder that the Render Tab on any Object Node allows you to specify reflection/refraction masks as well as illumination linking (usually created using the Data Tree)